Practical Sustainability: Hello Sunshine! Goodbye Dryer...

Laundry on the line in Dubrovnik, Croatia

Laundry on the line in Dubrovnik, Croatia

We just returned from our summer vacation, where we visited friends and stayed at private homes booked through AirBNB.com in several European towns and cities.  Each of our homes-away-from-home had one thing in common: they had washing machines, but none had dryers.  Once I got used to having to wait a day for dry clothes, I started to wonder if it might make sense to import this practice back to the USA, where over 83% of American households own a dryer, according to a report published by the US Census Bureau.

So what does drying our clothes really cost in environmental terms?  It turns out that a clothes dryer is the third biggest energy-hogging appliance in most US households (behind water heaters and refrigerators).  By ditching our dryers, which use 71% of the energy required for a load of laundry and produce 127 million tons of CO2 per year, we could eliminate the equivalent carbon emissions of approximately 30 coal-fired power plants annually.  And while eliminating or reducing our dryer use will clearly help the environment, there are other benefits to hanging our clothes to dry:

  • Saving energy means saving money.  According to the Natural Resources Defense Council, a typical US household spends $100 on its annual utility bill to operate an electric dryer and $40 to operate a gas dryer.  But our household is not typical and we estimate our costs to be significantly higher.  In fact, I calculated our per load costs based on my utility bill using this calculator and discovered that depending on whether or not I amortize the utility connection fees and taxes in my calculation – it costs between $0.30 and $1.30 to use our gas dryer for 45 minutes (or $0.70 $0.90 if our dryer were electric).  Multiply that by the number of loads you do in a year, and that represents real potential for savings.
  • Reduced dryer use translates to less wear and tear on your clothes.  Have you ever thought about the lint in your filter?  That's a layer of your clothing literally tumbling away.  And heat causes shrinkage.  Hanging your clothes to dry will protect them from shrinking.
  • There are indirect savings to be captured as well.  If you hang your clothes indoors in the winter, you'll have a free source of humidity as moisture evaporates into the air.  And if you forego the use of your dryer in the summer, you will save on the cost and environmental impact of your air conditioners as well.

What if you just can't bear the thought of ditching your dryer?  Or you live in a community that doesn't allow you to hang your laundry outside to dry?  There are things you can - and should - do to reduce the environmental impact of your laundry practices...

If You're In the Market for a New Dryer

If you're in the market for a new dryer, consider a highly energy efficient unit.  According to a report released last month by the Natural Resources Defense Council, simply raising US dryers to standards already in place overseas, Americans could save $4 billion dollars annually on their utility bills. By switching to the most energy efficient dryers, American households could prevent 16 million tons of CO2 from entering the atmosphere every year.  That's equivalent to the carbon dioxide sequestered by nearly 12 million acres of US forests per year (I used this EPA calculator).

Until 2014, heat pump dryer technology – the most efficient available, and already commonplace outside the US – wasn't available here.  That seems to be changing with LG's announcement of its model DLHX4072V heat pump condensing dryer. According to LG, “using a heat pump to preheat the air coming into the dryer recovers this heat and saves electricity, because it takes less electricity to move the heat than to create it with a conventional heater…In conventional dryers, all the energy that is used to evaporate the moisture in the clothes is vented outside and lost. The hybrid dryer technology is able to recover some of this wasted energy and use it to evaporate more moisture, saving energy.”  According to Consumer Reports, energy savings for the LG model may be as high as 50% versus conventional dryers. 

Starting next year, clothes dryers will be able to seek ENERGY STAR certification, which will require that they be 20% more efficient than standard models.  At a minimum, look for an ENERGY STAR rating when you’re shopping for your next dryer.

If You Can't Part with Your Existing Dryer

If replacing your current dryer isn't an option, then take the following steps to be as environmentally mindful as possible:

  • Use a drying rack and hang as much to dry as you can.
  • Clean your lint filter before every load.  Yes...EVERY load.  Pushing hot air through a clogged lint filter uses as much as 30% more energy than is required by a dryer with a clean filter.  It's that simple.
  • Use the highest spin setting on your washing machine that your clothes can tolerate.  Washing machines are much more efficient than dryers.  If you take the water out of the clothes with the washer, your dryer won't have to work so hard.
  • Use your dryers moisture sensor setting and remove the clothes when they're just slightly damp.  Your clothes will last longer than if you over-dry them.  And, if you hang them up right away, they'll require less ironing.
  • Dry multiple loads in succession.  It costs less to dry two loads one after another because you're able to use the heat you've already generated in the drum to dry the second load.

Weve been back for two days now and Ive cycled quite a number of loads of our familys laundryand have happily hung our clothes out to dry.  Go aheadgive it a try.  Hello sunshine!  Goodbye dryer


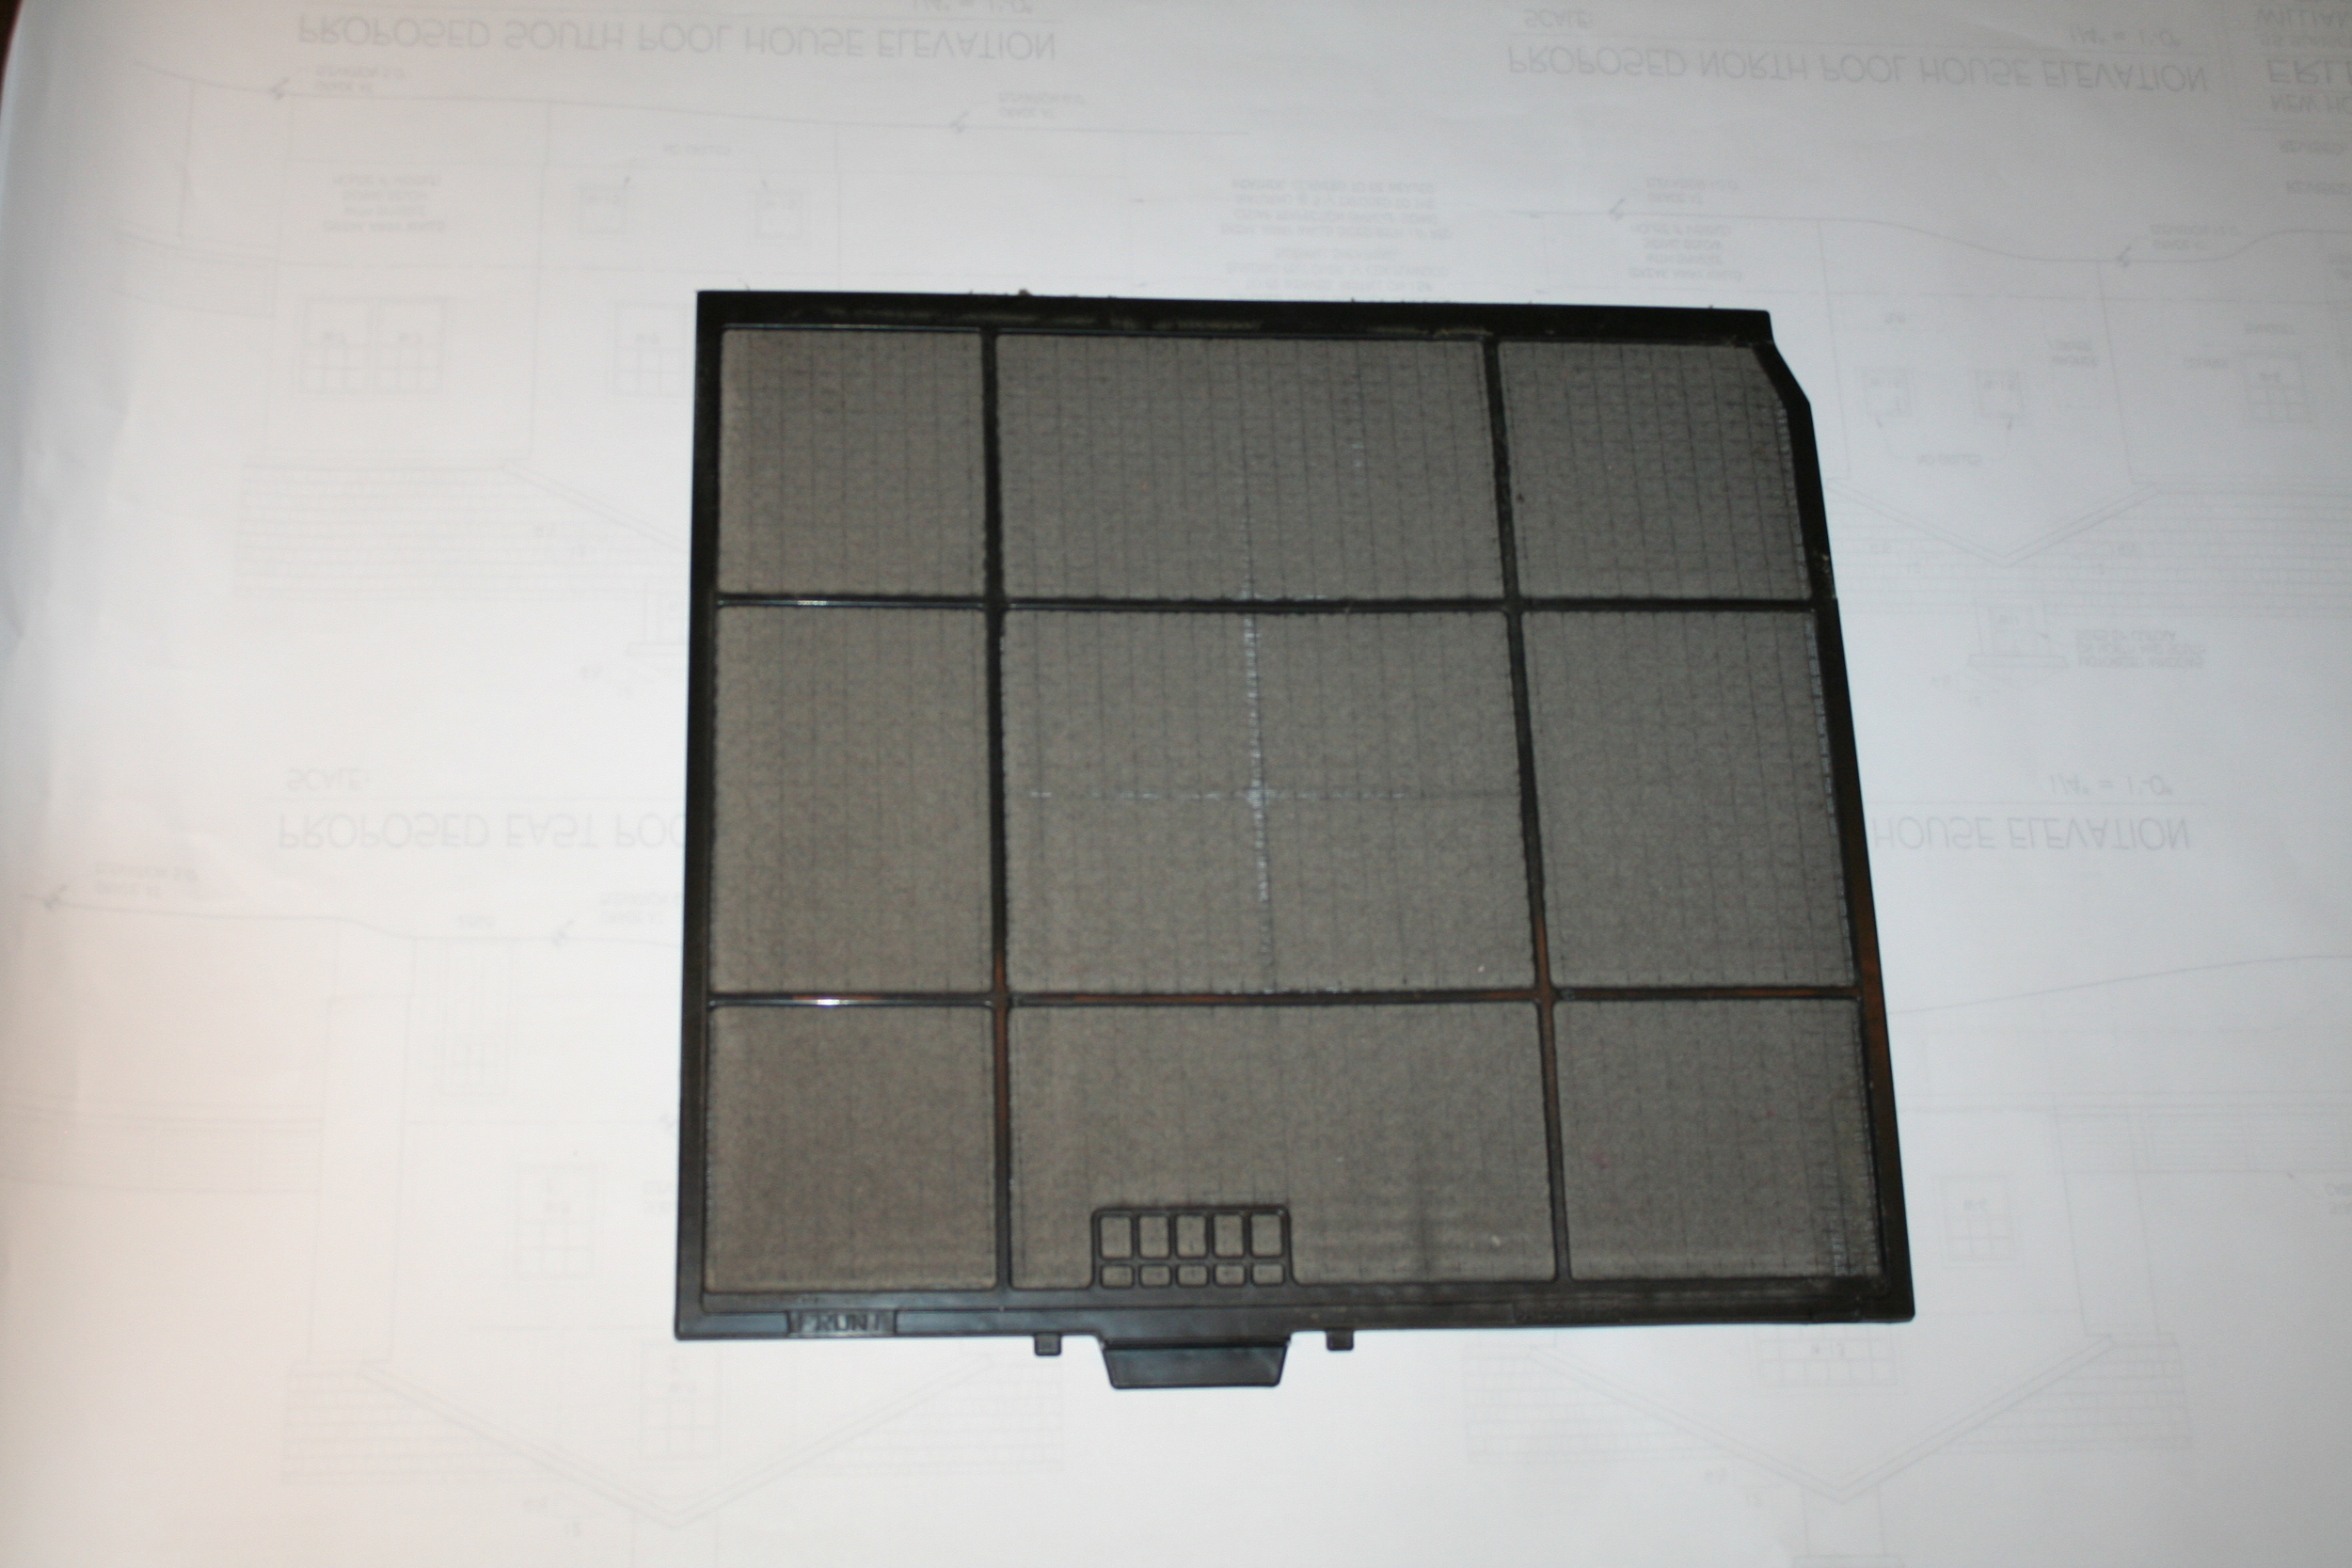
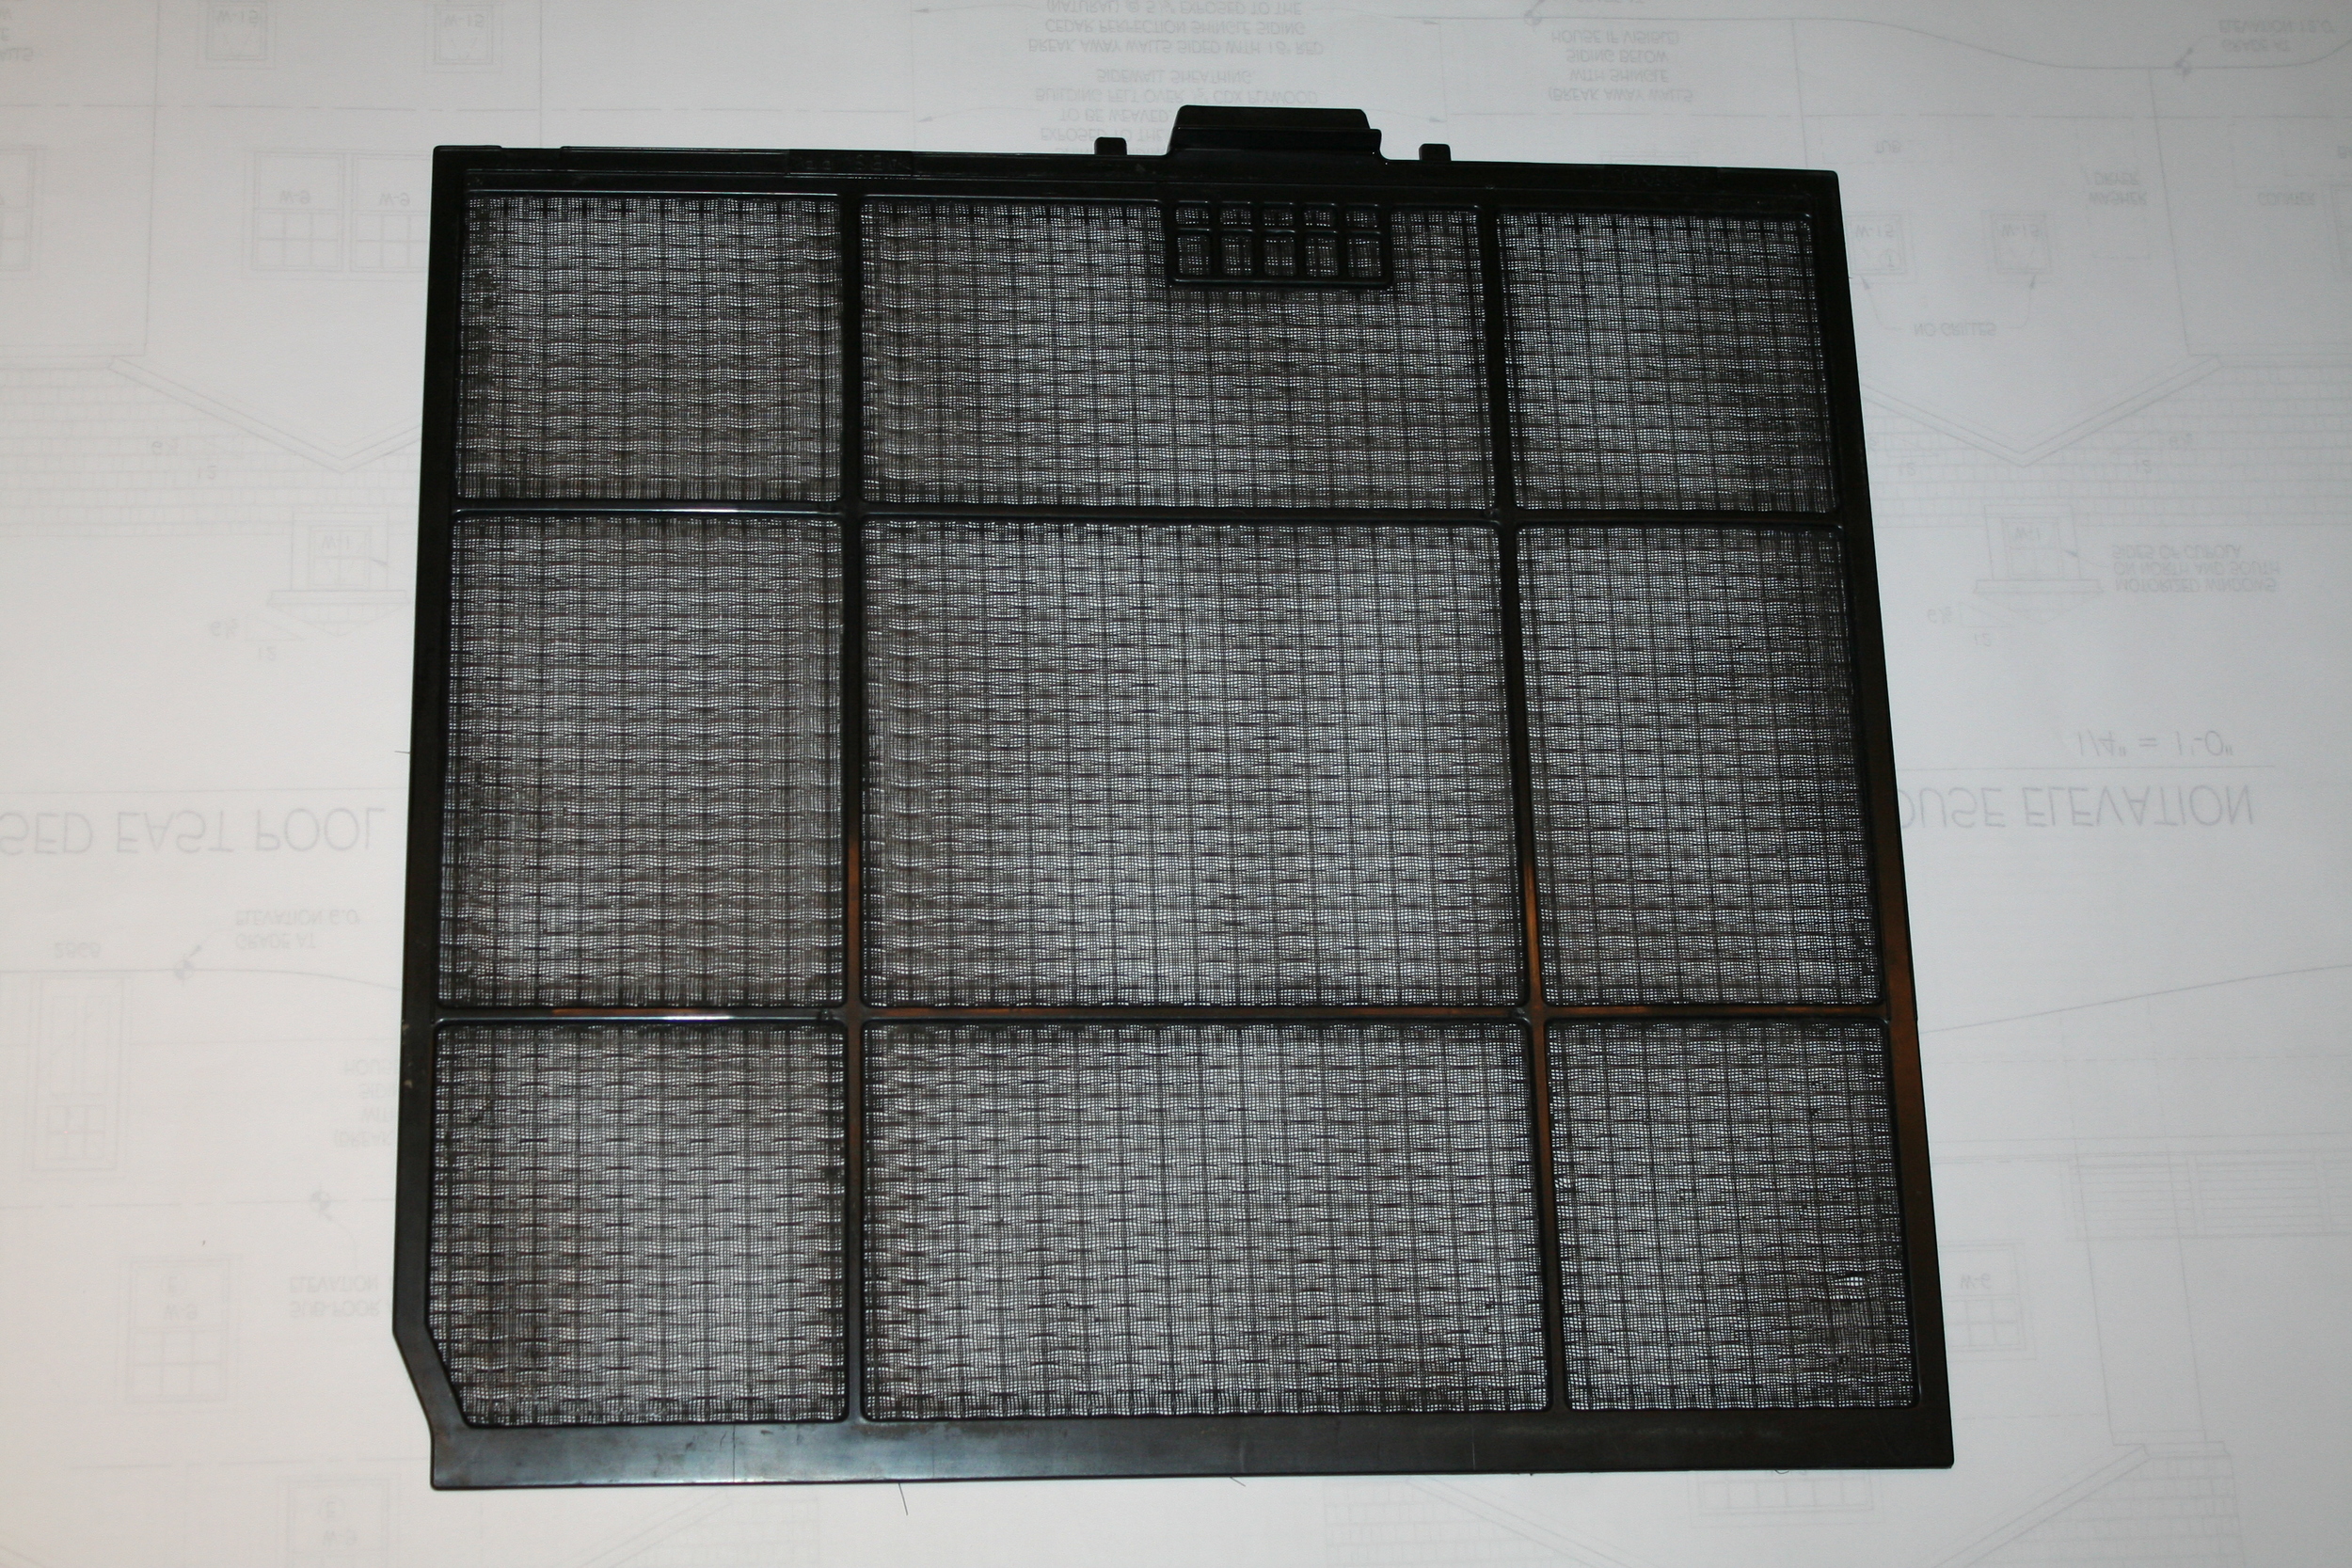
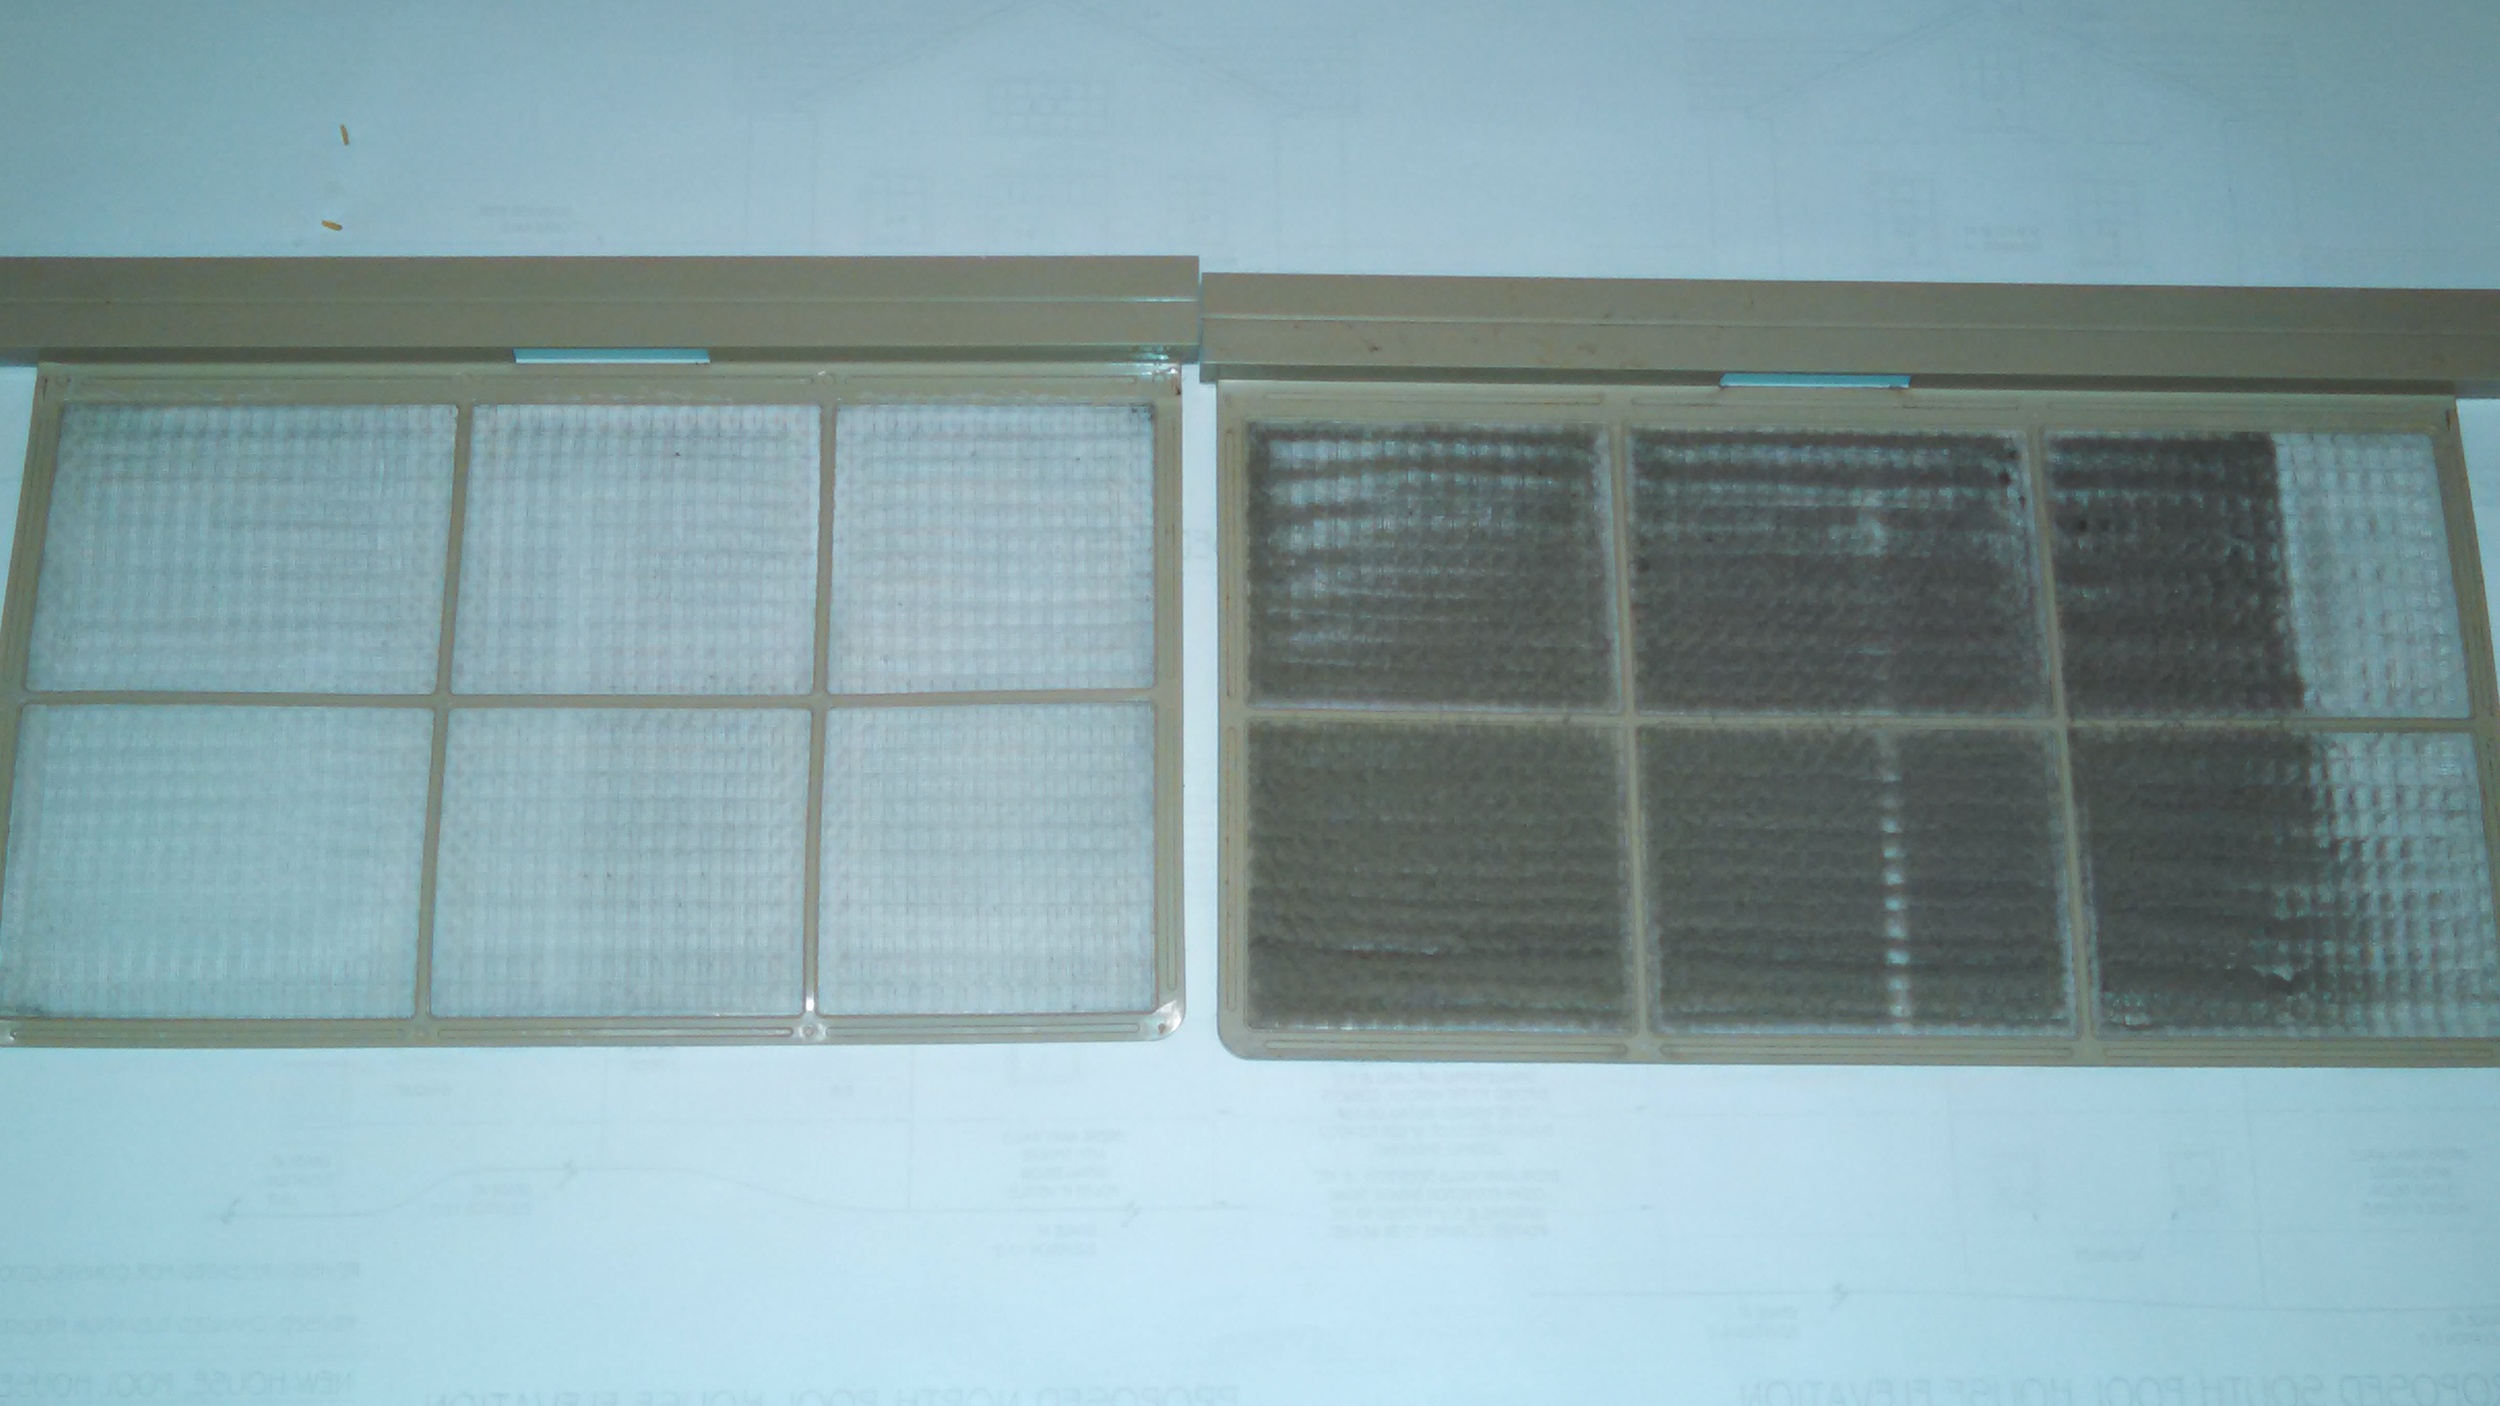
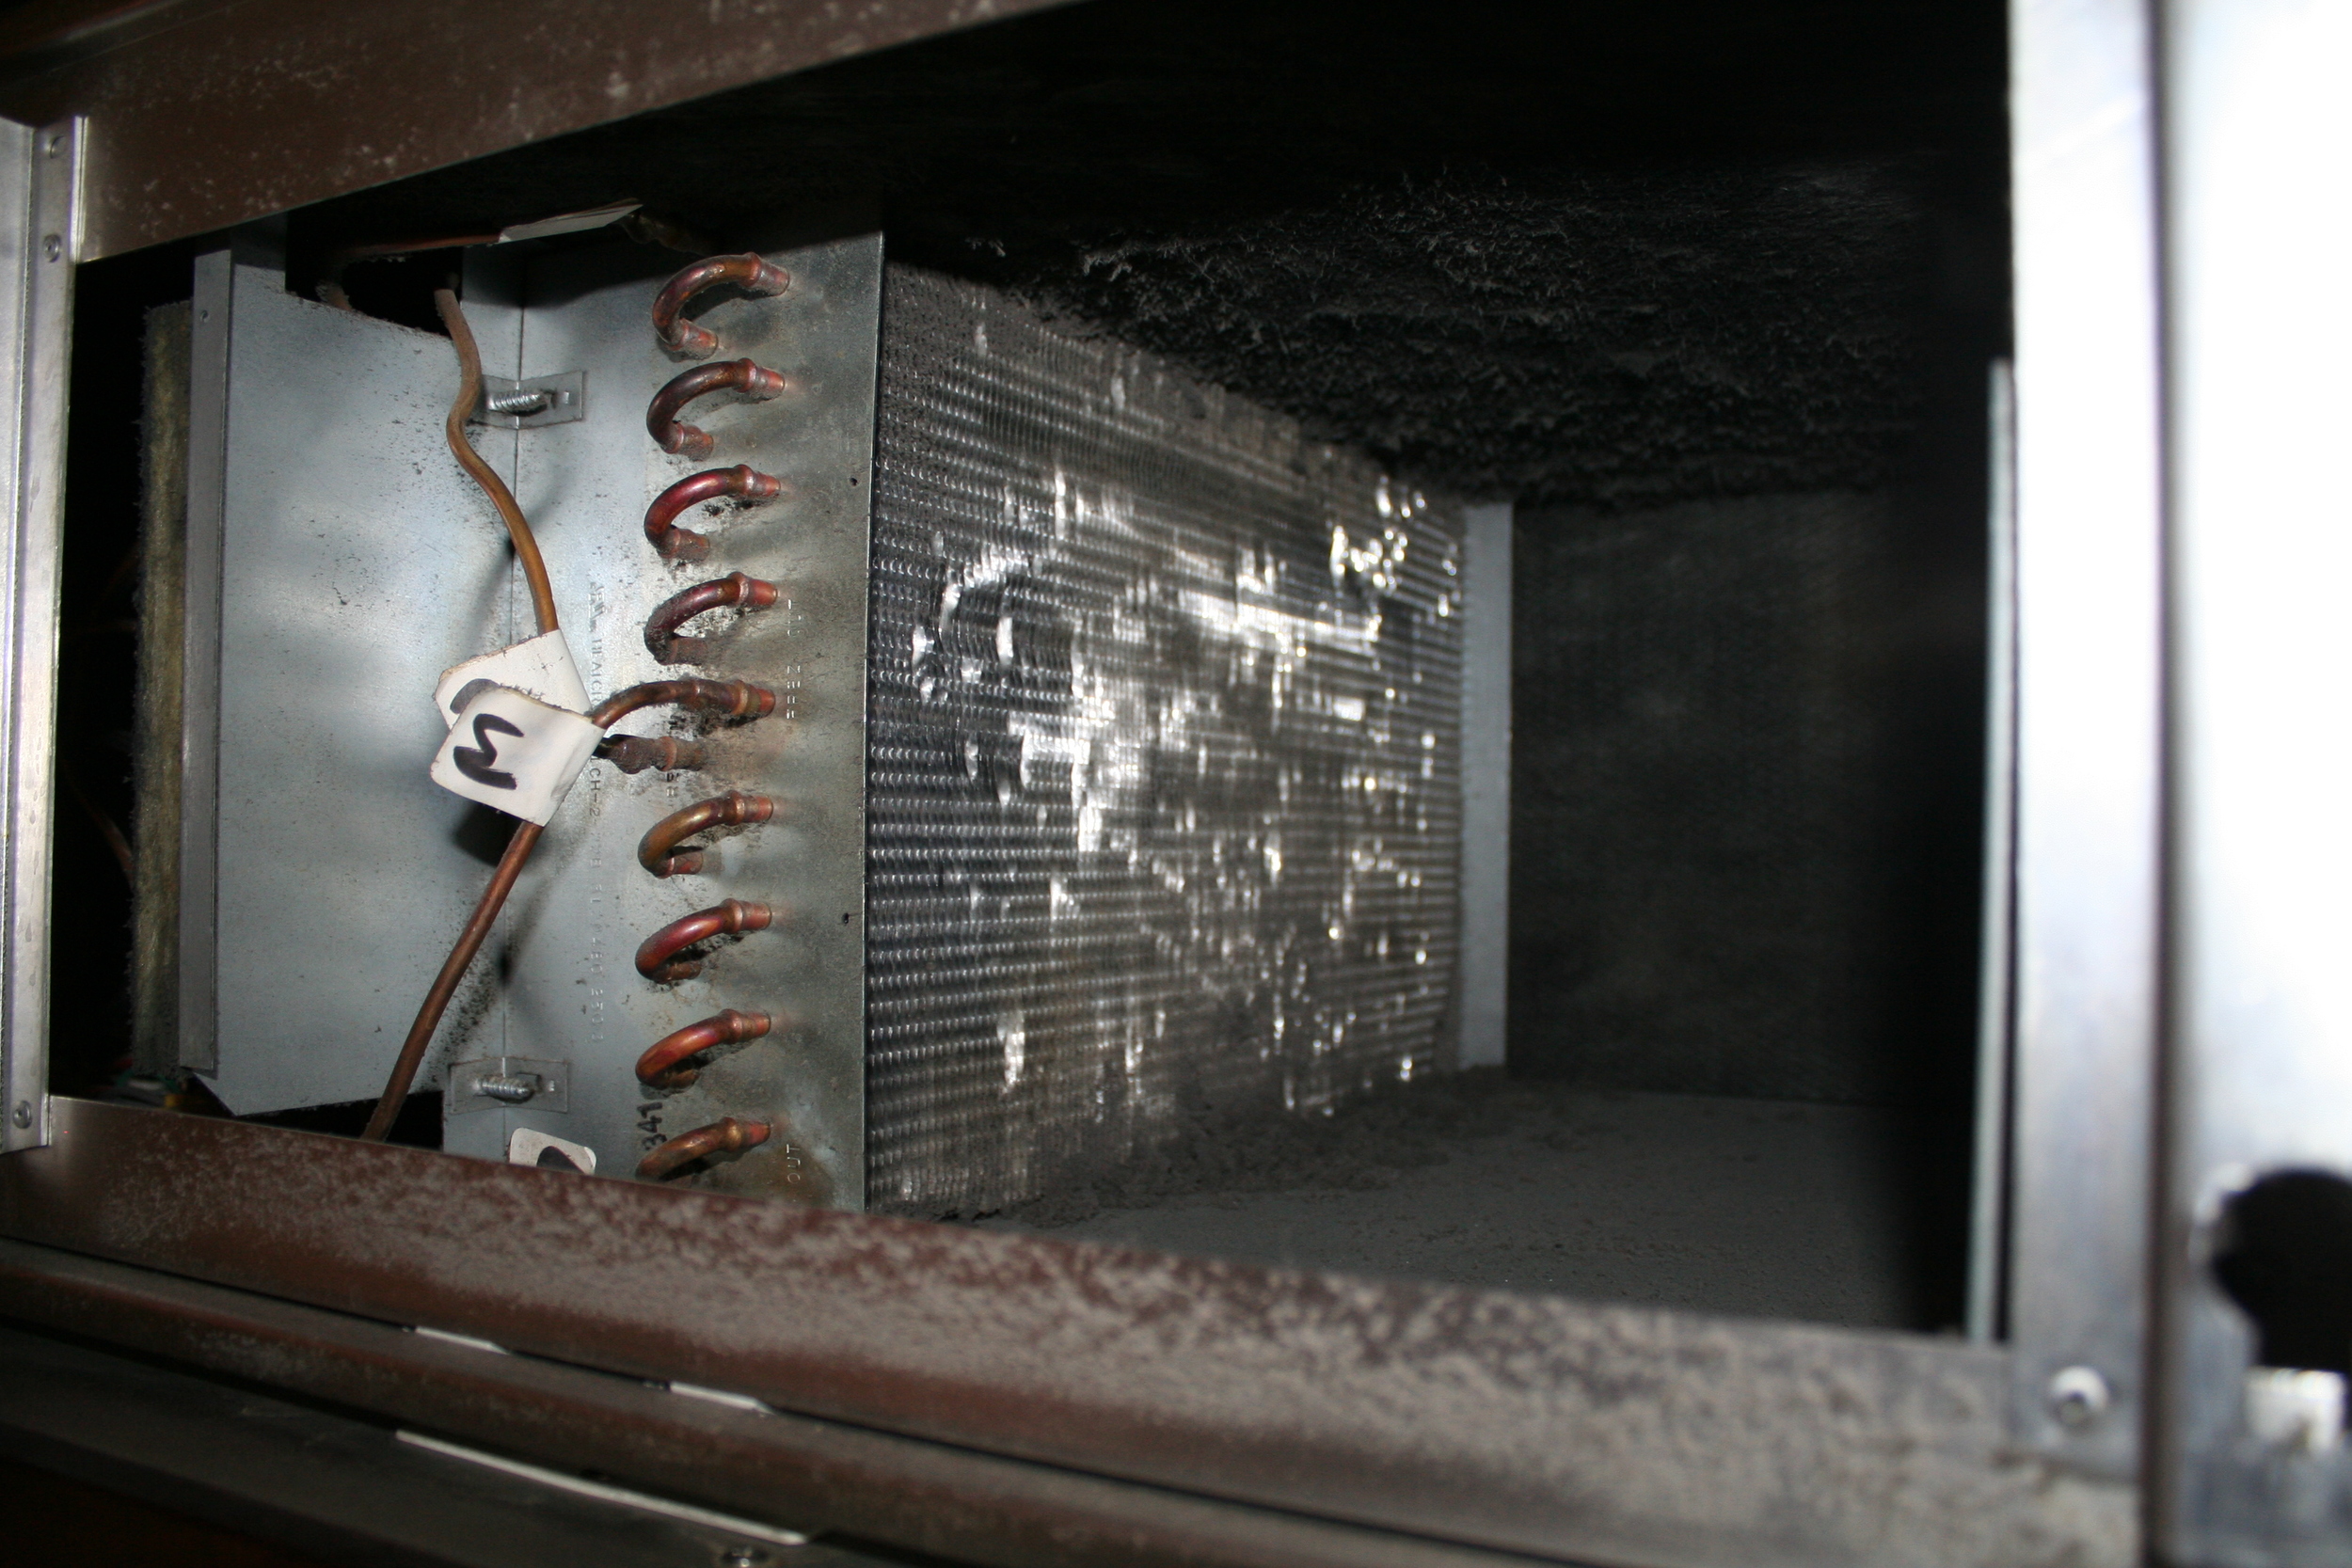
Practical Sustainability is a monthly column that offers ideas and tips for things we all can (and should!) do to live a more sustainable life on a limited budget. Past articles have addressed low flow shower heads, LED light bulbs, and cleaning the air filters on air conditioners and household appliances.

Adaptive Reuse and Deconstruction, Roman Style: Lessons from the Ancients

I have just spent a wonderful week with my family in Italy, where we traveled through Sicily and then to Rome.  From the perspective of sustainability, I think we could learn a lot from the Romans.  Not the 21st century inhabitants of Rome, but the ancient ones, as well as their immediate predecessors and successors...

According to the Building Materials Reuse Association (BMRA), "the construction, renovation, and demolition of buildings in the United States leads to the generation of 170 million tons of waste materials, more than half of which goes straight to the landfill." And materials aren't the only resources wasted during demolition.  Sara Badiali, Board Chair of the BMRA writes in the organization's February 2014 newsletter, "to demolish a 5,000 square foot building they typically use 6,000 gallons of water.  That comes out to roughly 1.2 gallons of water per square foot of building. That is over a gallon of clean water for every square foot of building that is being demolished to keep air quality on a demolition site legally safe."

So what would they have done 1,500 years ago?  It turns out that the ancient Romans were masters of reclamation and recycling.  And early adopters of the concept of Adaptive Reuse - meaning the reuse of a building for a purpose other than what was intended when it was initially constructed.  We see evidence of these practices all over Italy.

We toured Palermo, including La Martorana, a Norman church with exquisite Byzantine mosaics whose original construction dates to the middle of the 12th century.  In the 16th century, its structure and Byzantine mosaics were preserved while the building was expanded and a Baroque altar and facade were installed.  Rather than tearing down the old to build the new, the 12th century building remained in place and was enlarged without wasting the original structural materials.  

La Martorana (Palermo, Italy)

La Martorana (Palermo, Italy)

In Agrigento's Valley of the Temples, many attribute the survival of the spectacular Temple of Concordia - constructed by the Greeks ca. 440 BCE - to its renovation and subsequent reuse as a church at the end of the 6th century under Pope Gregory, when the space between its columns was enclosed and archways were created in the walls of the cella.

Temple of Concordia (Agrigento, Italy)

Temple of Concordia (Agrigento, Italy)

We encountered another example of in situ reuse - of an even older building - in the Ancient Greek/Roman town of Siracusa (Syracuse), where the vast columns and other structural elements of the Temple of Athena, a Greek Doric-style temple dating to ca. 470 BCE have literally been incorporated into the walls of the cathedral that today serves as the town's main cathedral.  Even its nave, which was constructed in the 7th century, incorporates the cella from the Temple of Athena.  While Agrigento's Temple of Concordia is no longer in use, the ancient Temple of Athena remains actively in use thanks to the practice of Adaptive Reuse.

Temple of Athena, now Siracusa's Main Cathedral, Side Exterior Showing Reuse of Greek Columns (Siracusa, Italy)

Temple of Athena, now Siracusa's Main Cathedral, Side Exterior Showing Reuse of Greek Columns (Siracusa, Italy)

In Rome, at nearly every turn, we encounter examples of reuse - of whole buildings as well as reclaimed building materials.  

It is known that, after the fall of the Roman Empire, the Colloseum - which had been built in 70 AD at the height of the Roman Empire - became a squatters village.  During the Middle Ages and Renaissance, many of the large stone blocks that comprised its upper tiers and the marble used for its seats were carted off to be reused in other buildings.  Notably, portions of the Colloseum were reused in the construction of St. Peter's Basilica.

Interior of the Colloseum (Rome, Italy)

Interior of the Colloseum (Rome, Italy)

Not all of Rome's city planners were as sustainability-minded as those who sought to reuse what they could.  We see a prime example in the Victor Emmanuel monument that today houses Italy's Tomb of the Unknown Solider.  We see evidence that an ancient Roman "apartment complex" - which our guide, an archaeologist, pointed out was probably housing for poor Romans - was demolished to make way for the monument that was built in 1861 to celebrate Italy's first king.  All that remains is a section of the ancient Roman building tucked into a corner between the monument and Michelangelo's steps that lead to Rome's Capitoline Hill.  What we don't know is if the builders of the "Vittoriano" sought to reuse the materials that were removed to make way for the new construction.

Remains of Roman Homes Tucked Between the Vittoriano and Michelangelo's Steps (Rome, Italy)

Remains of Roman Homes Tucked Between the Vittoriano and Michelangelo's Steps (Rome, Italy)

So what can we learn from the ancients?  If you've been following Sunset Green Home, you'll know that we advocate taking the time and energy to plan a "deconstruction" rather than demolition.  Doing so will keep the reusable materials out of the landfill.  And, we are proponents of Adaptive Reuse to contain urban sprawl and save precious resources.  

I'll leave you with a present day example.  Consider the attractive and functional Green Building, a 100+ year old former dry goods store that was redeveloped into Louisville's first LEED Platinum certified commercial building.  

The Green Building in Louisville (Ted Wathen/Quadrant Photography, Courtesy The Green Building)

The Green Building in Louisville (Ted Wathen/Quadrant Photography, Courtesy The Green Building)


Building a Durable and Energy Efficient Pool: A Conversation with John Tortorella

I sat down recently with John Tortorella, a designer and builder of custom gunite pools in Southampton NY, and the CEO and founder of the Tortorella Group, to discuss pool durability and energy efficiency, two qualities that are “top of mind” for the Sunset Green Home project. 

John Tortorella (photo courtesy of Tortorella Group)

John Tortorella (photo courtesy of Tortorella Group)

If you’ve been following our story, you know that the old house on the site of the Sunset Green Home project was made uninhabitable by Hurricane Sandy.  The property didn’t have a swimming pool, but the new Sunset Green Home will have one.  So, just as we have been thinking about durability and energy efficiency for the Sunset Green Home itself – which we hope will earn LEED Platinum certification at completion – we are thinking in parallel about the same issues for the swimming pool.

Like many coastal properties, Sunset Green Home will be built on pilings that are approximately 10 feet above current grade.  The pool will be set into a deck at the level of the ground floor of the house.  On the one hand, this means we won’t have to do any excavation.  On the other hand, it also means that the entire pool structure has to be constructed above the ground…which is somewhat complicated.  

Our pool construction, just like that of the house, starts with pilings that are driven deep enough into the ground that they can support the load of the pool structure with no movement.  The pool contractor will then build steel (rebar) and concrete grade beams that span the piles in order to distribute the pool load over the piling system.  

Durability is critical!  Think of it this way: at 70 degrees, one gallon of water weighs 8.3 pounds.  Multiplying by the volume of the pool, we estimate that the Sunset Green Home pool will hold over 143 TONS of water (we used this pool volume calculator).  That’s a lot of weight.  And now imagine a similar storm surge to that of Hurricane Sandy, which would send a velocity flow of water right into the vertical wall of the deep end of Sunset Green Home’s pool. 

So how does one build a pool to withstand these types of forces?  And, if we’re going to be as energy minded about the pool as we are about a home that is seeking LEED Platinum certification, what should we do about energy efficiency?  These are the questions Kathryn Cannon (Sunset Green Home’s sustainability consultant) and I posed to Mr. Tortorella.

The first thing he did was pull out his mobile phone and show us a photo of a pool he had built just prior to Hurricane Sandy, which the homeowner's insurance adjuster believes may very well have saved the owners’ oceanfront home.  The pool had been built on helical piles just up against a dune.  After the storm, when 100 feet of dune had been washed away, what was left was the exposed underside of the pool structure – which was completely undamaged.  THAT, John Tortorella said, is a durable pool.  And, because the pool withstood and deflected the forces of the storm, the house behind it was undamaged.

Photo of Exposed Pool Structure Following Hurricane Sandy (photo courtesy of Tortorella Group)

Photo of Exposed Pool Structure Following Hurricane Sandy (photo courtesy of Tortorella Group)

So what makes a durable gunite (i.e., pressure sprayed concrete) pool?

Gunite Pool Under Construction (photo courtesy of Tortorella Group)

Gunite Pool Under Construction (photo courtesy of Tortorella Group)

  • The quality of the rebar used for framing of the grade beams and pool walls.  Tortorella uses 1/2”  and 5/8" thick rebar (and thicker rebar in some cases) versus the industry standard 3/8” thick steel on even his standard pools, and his crew takes care to bend – not splice – the pieces where angles are required
  • The design of the rebar caging for grade beams and pool structure.  Depending on how high the pool is built above grade, the rebar structure may vary from a single cage of 1/2" rebar at 10" on center, to as much as a double cage of rebar for a pool that one can literally walk beneath.  To avoid cracks, Tortorella reinforces his pool structures with rebar under and around the pool skimmers
  • The density of the concrete walls.  It’s not enough to specify a particular thickness of gunite.  Tortorella nozzlemen receive extensive training and are certified for gunite application, which Tortorella says results in a uniform, dense application that contains no “voids” within it.  It’s the uniformity of coverage and proper encapsulation of the steel rebar that gives the gunite its strength
  • Sizing the pipes correctly.  The durability of the pool pumps and other equipment depends on smooth flow of water through the system.  Undersizing the pipes or including too many twists and turns will cause the pump to overwork, resulting in  shorter equipment lifetimes and increased - unnecessary - electricity use
  • Including pool components that work holistically to deliver a safe and comfortable aquatic environment.  Salt water pools are the state of the art, and their salinity is approximately equal to that of a human tear.  Such pool chemistry, if properly balanced, will feel better on skin and eyes, and provides for more pleasurable swimming.  The salt in the pool is also used to create pure chlorine via a salt generator.  But Tortorella warned that the process of generating chlorine from salt will raise a pool's pH - so using a salt generator alone is not recommended.  He cited a trio of Pentair products – Intellichem (the "brain" that continuously measures and tests chlorine and pH levels), Intellichlor (which produces chlorine from salt) and IntellipH (which balances the pool's pH level) – that work together to adjust and maintain a pool’s chemical balance.  But he warned that using the salt generator alone, which some customers do to control first costs, may be penny wise and pound foolish...doing so may result in rough and unsightly scale buildup on the pool walls and may deteriorate the pool heater's heat exchangers.

And what about energy efficiency?  There are things that pool owners can – and should! – do to reduce a pool’s energy use and environmental impact.  

  • Install an ASTM-approved automatic pool safety cover…and then use it!  Not only will this habit result in a safer pool environment, but closing the safety cover when the last swimmer comes out of the pool can save up to 70% in heating costs, and will reduce by as much as 50% a pool’s evaporative water loss and 60% of pool chemical consumption according to the US Department of Energy
  • Include an ENERGY STAR certified variable speed pool pump.  According to the US EPA’s ENERGY STAR web site, on average such pumps result in savings of over $300 annually (and potentially even more in warm climates where pools are used throughout the year or when the newest and most efficient models are installed; John cited a savings of as much as $1,800 - $2,000 for local installations using the Pentair model).  In fact, according to the ENERGY STAR web site, “If all pool pumps sold in the United States were ENERGY STAR certified, we would save about $113 million per year and prevent greenhouse gas emissions equivalent to those from 140,000 cars.”
  • As above, design the pool’s plumbing system correctly.  An energy efficient pump is no good if it’s trying to push water through a pipe that is too small!  Getting the plumbing right means that the pool pump won’t have to work so hard to move the water through the system.
  • Heat the pool water using solar panels (which work best during the warm sunny months of the year) instead of gas heaters (which burn fossil fuels and contribute to global warming).  And install solar PV panels to generate electricity for supplemental pool heat (check for federal, state and local rebates and tax incentives).  Design the pool with “deep heating” – heat rises, so heat the pool from the bottom rather than at the top to avoid losing the pool heat into the air

If you’re building a new swimming pool, make sure to ask your contractor to incorporate these and other best practices into its construction and operation.   

Happy swimming!


Practical Sustainability: Clean Your Filters Before You Use the A/C

There is evidence everywhere around us that spring has sprung.  Flowers are blooming, the trees are in full leaf, and my asparagus patch is almost finished for the season.  And…it’s been warm enough on a couple of days already that we’ve started to use our air conditioning.

And this reminds me that it’s time to clean my filters.  Clogged filters can lead to higher energy bills, excess strain on air conditioners and other appliances that require air filtration, and a drop in indoor air quality.

So here’s my mea culpa.  I am guilty of allowing filters all over my home to get unbelievably nasty.  And that’s why this month’s Practical Sustainability column is about spring cleaning…of all of the filters in my home.

I started with the window air conditioner from my home office, whose filter was almost completely clogged.

My home office window air conditioner filter before...

My home office window air conditioner filter before...

...and after.

...and after.

And then I moved on to my daughter's through-wall air conditioning unit that contains two side by side filters.  I cleaned the one on the left.  Before I did so, it looked just like the one on the right.

Two filters from my daughter's through-wall air conditioner - one before and one after cleaning

Two filters from my daughter's through-wall air conditioner - one before and one after cleaning

And this is what my refrigerator coils looked like.  Not so bad, since I had a service call a couple of months ago and the serviceman vacuumed the condenser area. 

The refrigerator condenser fins before...

The refrigerator condenser fins before...

But the fan side was still pretty dirty and the coils definitely needed some vacuuming.  The serviceman warned me to turn the refrigerator off before cleaning, and to be careful not to crush the condenser fins while cleaning them.  Here it is after a careful vacuuming with the dusting attachment of my vacuum.

...and after cleaning

...and after cleaning

Most of our apartment is served by a central air conditioning system, whose washable filters are located near the two air handlers.  I replaced those as well.  And cleaned the dishwasher-safe baffle filters of my range hood.  I replaced the filter on our water jug.  I even cleaned the filter on the back of our hair dryer to make sure it was running smoothly.  And lastly, I replaced the vacuum cleaner’s filter! 

The best part of this month’s Practical Sustainability activities?  It cost me nothing and took only a few minutes of my time.  The LEED green building program recommends replacing heating system and air conditioner filters every 3 – 12 months (and according to manufacturer instructions). 

So what are you waiting for?  Look around your home for everything that has a filter.  And then go clean it!  You’ll breathe easier.  Your appliances will thank you.  And your energy bill will reflect the effort.

Happy cleaning!

We've Broken Ground! And what a beautiful day it was...

Several dozen of our pilings already in place!

Several dozen of our pilings already in place!

If you’ve been following the progress of Sunset Green Home, you know that we have finally broken ground.  And today we hosted an “official” Groundbreaking Ceremony at the project site to thank the elected officials who made possible the green building tax incentives that we hope to capture.

We had about 40 people in attendance, including neighbors, environmental activists, providers of green building products and technologies, our sponsors from Marvin Windows and Speonk Lumber, representatives from the Town of Southampton, real estate professionals, the Sunset Green Home project team, and others. 

Our guests of honor were Assemblyman Fred Thiele and Greg Blower from Senator Kenneth LaValle’s staff.  At the last minute, Southampton Town Supervisor, Anna Throne-Holst, was unable to join us…but she remains one of my honorees because the tax incentives wouldn’t have been possible without her support. 

L to R: Greg Blower, Office of New York State Senator Kenneth LaValle;  Kathryn Cannon, LEED AP Homes and SGH Project Team Member; New York State Assemblyman Fred W. Thiele, Jr.; Kim Erle, SGH Project Team Leader; Chris Mensch, General Contract…

L to R: Greg Blower, Office of New York State Senator Kenneth LaValle;  Kathryn Cannon, LEED AP Homes and SGH Project Team Member; New York State Assemblyman Fred W. Thiele, Jr.; Kim Erle, SGH Project Team Leader; Chris Mensch, General Contractor and SGH Project Team Member; Bill Heine, Architect and SGH Project Team Member; Richard Manning, LEED Green Rater and SGH Verification Team Member.

So what exactly are these green building tax incentives that I keep talking about?  They’re an embodiment of the concept of “Think global, act local,” often attributed to social activist and city planner Patrick Geddes from his 1915 book “Cities in Evolution.”

In 2012, New York State Assemblyman Fred W. Thiele, Jr. and New York State Senator Kenneth LaValle sponsored legislation that would authorize local governments and school districts to provide tax incentives for homes built to LEED® (Leadership in Energy & Environmental Design) or equivalent standards.  Southampton Town Supervisor, Anna Throne-Holst, shepherded the local effort, which was adopted by the Town of Southampton on August 13, 2013. 

Receiving flowers from our project sponsors at Marvin Windows

Receiving flowers from our project sponsors at Marvin Windows

And what does all of this mean for us?  If we succeed in our goal of LEED Platinum certification at the completion of our project, we will earn a property tax exemption equivalent to approximately $14,000 over the course of ten years.  This tax incentive more than covers the cost of our Verification Team, and a couple of the green building strategies that we are incorporating into the project.  But what makes this exciting to us is that it’s essentially “free money” in the sense that we are building the house that we had planned all along, and – except for the added cost of verification – we believe the cost of construction will be no higher than if we weren’t aiming for LEED certification.

So, THANK YOU, Senator LaValle, Assemblyman Thiele, and Supervisor Throne-Holst.  I applaud your commitment to sustainable building. 

With Assemblyman Fred W. Thiele, Jr.

With Assemblyman Fred W. Thiele, Jr.

Sustainable Sites and Raising Oysters…What do These Have in Common?

This past weekend I attended an event sponsored by the Moriches Bay Project™ where participants helped to build oyster cages and set up an oyster farm off the dock of a local family's property.  So what does this have to do with the LEED® for Homes green building program?  A lot, as it turns out. 

Photo courtesy of Moriches Bay Project

Photo courtesy of Moriches Bay Project

The Sustainable Sites category of the LEED for Homes program addresses issues of erosion and surface water runoff, and aims to protect bodies of water in and around a LEED project site.  Why is this important?  As people move closer and closer to bodies of water, the potential for human activities to interfere with delicate ecosystems increases.  In the case of our local bays, non-functional septic systems, the use of lawn fertilizers, and application of chemical pest controls have deposited harmful non-point source pollution into the local waterways (see boxed information from the United States Environmental Protection Agency web site).

A full grown healthy oyster can filter up to 50 gallons of water in one day.
— Laura Fabrizio, Director, Moriches Bay Project

 As a result of these factors and other human activity, water quality in the Shinnecock and neighboring Moriches bays, has deteriorated to the point that the bays have experienced episodes of harmful algal blooms, and a dying off of eelgrass and shellfish populations. 

Moriches Bay Project's Dwight Surgan, right, demonstrates how to build oyster cages and set up an oyster farm

Moriches Bay Project's Dwight Surgan, right, demonstrates how to build oyster cages and set up an oyster farm

But programs established by the Moriches Bay Project and the Shinnecock Bay Restoration Program are aiming to reverse the harmful effects of human activity in the local waterways. 

Christine Santora, Program Coordinator for the Shinnecock Bay Restoration Program,  tells me that "over 75% of the nitrogen pollution coming into Shinnecock Bay comes from waste water (meaning septic tanks). So, this is actually a solvable problem (with a lot of effort and political/community will obviously!).  We are trying to provide an 'in the water solution.'  We know that changing our land-based problems will take a dedicated, longstanding effort, and will be expensive.  In the meantime, we are implementing some positive change within the bay which will not only restore important shellfish populations and habitat such as eelgrass, but could perhaps even buy some time until land-based problems are properly addressed." 

Each of these organizations sponsors important aquaculture programs that enlist local residents to set up oyster “farms.”  According to Laura Fabrizio, Director of the Moriches Bay Project, “a full grown healthy oyster can filter up to 50 gallons of water in one day” thereby helping to repair the damage caused by human activity. 

The Sunset Green Home project is located adjacent to an undeveloped waterfront lot on the Shinnecock Bay.  So what are the strategies that Sunset Green Home will use to reduce the likelihood that we cause any harm to the local waters?  We’re going to:

  • Build a new septic system that is elevated away from ground water
  • Incorporate dry wells and rainwater harvesting to contain storm water runoff
  • Landscape with drought tolerant turf, and native and adaptive plants – which require less fertilizer and water than invasive species
  • Create a 75 foot native vegetation buffer between the home and the adjacent waterfront lot, which is designed to further protect the bay from potential runoff
  • Include non-toxic pest control strategies – like non-toxic termite baiting – to reduce the need for poisons to control insects and other pests

Incorporating these and other strategies will help us satisfy LEED prerequisites and earn points toward our LEED certification. 

And, in addition, we’re talking to the Shinnecock Bay Restoration Program about setting up our own oyster farm.  I've already recruited one of our neighbors to participate.  The next thing I need to do is recruit my remaining neighbors so that we all do our part to keep our bay healthy.

Happy Farming!


House Tours: A LEED® Gold Caribbean Idyll. And That's Just the Beginning...

29, The Venetia, Grand Cayman - a LEED for Homes Gold certified home

29, The Venetia, Grand Cayman - a LEED for Homes Gold certified home

James Whittaker, a Caymanian with a background in finance and CEO of the GreenTech Group, a conglomerate of sustainable companies based in the Cayman Islands, has set out to green the Caribbean, one project at a time.  Completed in 2010 and certified in 2012, GreenTech's Sailfish Estate home, a LEED Silver 5,000+ square foot luxury private residence, was the first LEED certified home outside the U.S. and Canada.  Participating in the program's international pilot, it edged out a LEED certified residence in China to win this honor by mere days.  Since then, Next Design & Development, the design, management and development company in James' portfolio of sustainability-related businesses, has either built or has on the boards a handful of residential developments, each of which will seek certification under the LEED for Homes program.  His partners includes architect and LEED Green Rater, Stace McGee, a New Mexico based sustainability expert (who is also on the faculty of USGBC) who spends one week each month on the Island, and Ryan Ostendorf, a real estate and development expert and project manager.

The latest GreenTech project to achieve certification won that honor this week - at a level of Gold certification.  The residence is one in a development that requires homeowners to stick to an approved 3,000 square foot stock floor plan.  Every house looks the same from the outside, but the 29 Venetia home isn't like those that surround it.  Completed in 2013, its homeowners haven't paid an electric bill yet - in contrast to their neighbors, who spend $800 per month or more with the Caymanian electric utility.  To achieve this level of energy efficiency, the home was constructed with insulated concrete forms, and included solar PV, solar thermal and a dehumidification system to protect the home from the Caribbean climate. GreenTech provided the LEED for Homes certification services and sustainability consulting for the project. Images courtesy of GreenTech (Cayman) Limited.

Like many of us who have embraced sustainable development, James isn't only in it for the profits – although he acknowledges that green building can earn a careful developer a premium over a traditionally built home (while James estimates that a LEED home costs him 8% more to build than a traditional home, it can fetch up to a 20% premium on its selling price).  He told me "I'm optimistic that we can do a lot of really great things in sustainability in Cayman and the Caribbean." 

And those great things aren't all about designing and developing LEED homes.  James recently launched Project Green School as a pilot at the Triple C School in George Town, Grand Cayman to provide a "meaningful and fun perspective on sustainability."  The program is introducing a sustainability and renewable energy curriculum in the school.  Another of James' portfolio companies, GreenTech Solar, has installed solar panels at the school, and the students are being given solar kits.  Two additional schools are waiting to pilot the program, and once they're up and running, Project Green School will host solar decathlons and inter-scholastic competitions.  James expressed a hope that Project Green School will eventually encompass all the local schools and result in schoolchildren in the Cayman Islands growing up thinking about careers in the green economy.  Eventually he would like to see Project Green School embraced in other schools across the Caribbean. 

Another of James' initiatives is facilitated by SMART Energy, another group company, which brings sustainable energy services expertise to the Cayman Islands.  Among other essential services offered, SMART Energy transforms existing and inefficient commercial and residential buildings into highly efficient ones that become more profitable, less costly, more productive and sustainable places to work and live.  

James and I toured Grand Cayman for several hours, stopping at GreenTech Group projects at various stages of completion, ranging from empty lots to construction sites to completed homes.  James explained that one of the keys to his success is his team's deep understanding of building science and sustainability.  And when he hasn't been able to find the right green technology locally, he uses another of his portfolio companies, GreenTech, to import and manage the distributorship of the products he needs.  James cited the example of Logix ICF.  When he couldn't find ICFs locally with a high enough R-value (R26) for certain LEED Gold or Platinum projects, he negotiated for GreenTech to become Logix ICF's local distributor, thereby creating the supply chain integration that ensures the GreenTech Group can design and build to the highest LEED for Homes standards.

He also talked about his projects' durability planning elements, which are designed to protect the homes from severe weather events like Hurricane Ivan, which devastated the island in 2004 and damaged 83% of the island's housing stock.  Some of GreenTech Group's key durability measures include:

  • Designing homes a minimum of one foot higher than Hurricane Ivan's flood level
  • Installing dehumidification systems to fight the effects of coastal living
  • Using recycled plastics and composite materials on exteriors to counter the effects of tropical sun and island weather
  • Building with ICFs and steel, and incorporating double hurricane strapped standing seam metal roofs
  • Including 12"- 18" of cement board or waterproof sheetrock to minimize damage should flood waters reach the homes' interiors
  • Using the highest quality impact rated and insulated windows and doors
James Whittaker, Founder, Next Development Group

James Whittaker, Founder, Next Development Group

Toward the end of my tour of GreenTech's projects, James and I spoke about legacy.  He expressed his desire to help transform the Cayman Islands into a "hub of sustainability in the Caribbean."  He says he has grand plans and small plans - that range from a $2 billion plan to stop the urban sprawl of the capital city of George Town to developing affordable housing to continuing to create luxury private homes, forming key industry organizations and educational programs.  While his team often talks about highly attractive projects on other Caribbean islands, James asks them to stay focused on Cayman.  "Let's focus our resources and perfect the model here first – and then take the show on the road." 


Practical Sustainability: It's Time to Change Your Lightbulbs!

You've heard about LED light bulbs.  But you're still using incandescent bulbs?  It's time to make a change!

When most of us think about "going green," we imagine ripping open our walls to accommodate new insulation, spending thousands of dollars on solar panels, or perhaps hiring an electrician to install smart thermostats. 

One 60W Cree LED bulb in each of the bedside lamps and three 75W Cree LED bulbs in the overhead fixture

One 60W Cree LED bulb in each of the bedside lamps and three 75W Cree LED bulbs in the overhead fixture

These may all be worthwhile investments.  But they’re projects that take planning and motivation.  And the LEED for Homes program (in which Sunset Green Home is participating) rewards projects for both large and small sustainability measures.  So in this month's Practical Sustainability column, I say start with something easy.  There’s one thing that you can do today - right now, even! - to reduce your impact on the environment without breaking the bank. 

What I'm talking about is changing your light bulbs.  And I don’t mean CFLs.  Frankly, I've never been a fan of them.  And they still come fraught with disposal problems (and woe to you if you break one and have to deal with a mercury spill). I'm talking about LED light bulbs.  They've come way down in price, emit light that is comparable to your existing incandescent bulbs, and - if you happen to be a card-carrying member of the AARP - they'll last long enough that you may never have to change your light bulbs again!

Between February 2012 and March 2013, the US Department of Energy conducted a three-part study that evaluated the life-cycle impact of LED replacement bulbs versus CFLs and traditional incandescent lamps (you can read a summary of the study here).  On almost every dimension evaluated, LED light bulbs come out ahead. 

On an apples-to-apples basis, life-cycle energy consumption of LED bulbs (including the energy used in manufacturing, packaging and transporting the bulbs, in addition to the energy consumed when they are in use) is roughly equivalent to mercury-containing CFLs, and only one quarter that of traditional incandescent bulbs.  2015 LED performance targets, if met, would decrease their life cycle energy use again by half, making LED bulbs the clear winners in terms of energy consumption.

We are choosing LED light bulbs for the Sunset Green Home project for several reasons.  In addition to their energy efficiency, LED light bulbs produce light without the heat of incandescent bulbs.  Less heat means a lower cooling load, and that will enable us to reduce the size of our HVAC equipment.  So, we'll save money over time with the lower energy consumption of LED light bulbs and we'll save money up front by purchasing less cooling capacity in our air conditioning system.

I have been trying out LED light bulbs in my apartment so that I'll know what to buy when the Sunset Green Home is completed. I've replaced my incandescent light bulbs with Cree's soft white (2700K) 60W and 75W equivalent standard LED bulbs, and TCP's 40W equivalent candelabra LED bulbs from Homedepot.com (I also tried 3000K LED bulbs from a "big box" store, but I prefer the Cree and TCP bulbs' color and light quality; there are still many brands that I haven't tried). My dimmer switches are over 10 years old, and I've had no problem dimming any of these bulbs. These bulbs cost me on average less than $10 apiece.
In fact, although this article was scheduled for later this month, I was motivated to publish it now because I just learned that Homedepot.com is having a sale on the Cree bulbs that have worked so well for me! Click on the image or the link below to take advantage of the sale on Home Depot's 6-pack of 75W equivalent Cree LED bulbs.
Cree 75W Equivalent Soft White (2700K) A19 Dimmable LED Light Bulb (6-Pack) BA19-11027OMF-12DE26-1U110

My parents visited me recently and were impressed with the look and light quality of the LED bulbs in my apartment. When my mother, who is in her 70s, described placing a step stool on top of their mattress and then trying to keep her balance while changing the bulbs over her bed, I thought "never again!"  We walked to my local Home Depot and bought her some of the Cree LED light bulbs so that she can replace the bulbs over her bed and in her kitchen recessed light fixtures – and I can rest easier knowing that I won’t get a phone call about how she broke a bone falling off a ladder while trying to change a light bulb!

If you’re looking for justification for changing to LED light bulbs, here you go:

1.     They’re more energy efficient.  Over their lives, they’ll save you money

2.     They’re friendlier to the environment than CFLs and even traditional incandescent bulbs

3.     LED light bulbs should last for years – so putting them in hard-to-reach places is a “no brainer” – you may never have to change the bulbs again…and this is great news if you are more “senior” and don’t want to risk falling from a ladder!

Having had such success replacing my incandescent bulbs, I have decided to replace the light bulbs in 22 recessed low voltage halogen fixtures too.  These bulbs are more expensive, but I've had trouble with the halogen bulbs' light output and dependability (not to mention that they're energy hogs!), so I'm eager to try something different, and LEDs appear to be the best option.  At around $30 per bulb, I'm going to replace them in batches, starting with my recessed kitchen fixtures.  I'll report back when I have a final result!

So what are you waiting for?  This is Practical Sustainability...It’s time to change your light bulbs.  And LED light bulbs are the answer!

Practical Sustainability: Change To Low Flow Shower Heads

One of my subscribers recently commented that she hoped I would post some practical tips for making an older home more energy efficient and environmentally friendly.  So today I’m launching the first of a monthly series I’m calling “Practical Sustainability” – things we all can (and should!) do on a limited budget.  This month’s column is all about showers - specifically, changing to low flow shower heads.

Our newly installed low flow shower head

Our newly installed low flow shower head

According to the United States Environmental Protection Agency (EPA), showers account for 17% of residential indoor water use.  If your shower heads were installed prior to 1994, their flow rate may be as high as 5 gallons per minute (gpm), or 2.5gpm if they were installed after 1994 (and nobody tampered with their flow restrictors).  Today’s water-saving low flow shower heads that have earned the EPA’s “WaterSense” label have a flow rate of no more than 2gpm.  If each member of your family of four takes an eight minute shower, you could save as much as 16 gallons of water PER DAY if you swap out your old 2.5gpm shower head for a WaterSense shower head.  That’s almost 6,000 gallons of water annually…

Now that I have your attention, what does this really mean in terms of your impact on the environment?  First, if you’re like me, you probably prefer a warm shower to a cold shower!  And that means you’re using energy to heat all of that water.  The EPA estimates that if every household in the US installed WaterSense low flow shower heads, we’d save $2.6 billion in energy costs for heating water alone.

And now think about where that wasted water comes from and where it goes after it heads down your drain.  If your water comes from a municipal source, the water was treated at a water treatment plant and then piped to your home.  By using less water for showers, you’ll reduce the size of your water bill and lower the stress on our treatment and sewer systems.  California and other western states are experiencing a severe drought this year – a continuation of the conditions that earned 2013 the dubious honor of being the “driest year in recorded history for many areas of California.” So, saving water isn’t only about the impact on our wallets – but it’s also about recognizing that water is a scarce resource that we need to conserve.

And yet…haven’t we all encountered a cheap plastic hotel shower head that barely provided enough pressure to rinse the shampoo off a bald person’s head?  And is THAT what we’re signing up for if we switch to WaterSense labeled shower heads?  I recently embarked on a very unscientific search for an answer. 

As it turns out, we had a leak a couple of months ago from our master shower into the apartment below us.  We had to demolish the shower in order to replace its leaky shower pan.  We had renovated our apartment about 10 years earlier and had installed – and were very happy with – 2.5gpm Speakman Anystream shower heads in all of our showers.  Unfortunately, for some inexplicable reason, our shower head started spraying water from the perimeter of its faceplate following the shower stall repair.  Since we need to select shower heads for the Sunset Green Home, I decided to look at this as an opportunity to “test drive” Speakman’s low flow 2.0gpm Anystream shower head (Sunset Green Home will earn one point under the LEED® for Homes rating system by installing shower heads whose average flow rate is 2.0gpm or less).

I’m an Amazon.com junkie (ever since I purchased their Amazon Prime service, which gives me free two-day shipping on nearly everything).  So I turned to Amazon, where I found the S-2252-E2 low flow shower head for $66.48 (a 34% discount from the list price…and as of the date of this article the price has fallen even further, so I'm about to purchase a second one for my children's bathroom).  It came with plumbers’ tape and took about 45 seconds to install.  All I needed was a set of pliers.

And while my trial of a single shower head certainly can’t claim to be representative of an entire product class, I’m happy to report that the low flow Speakman Anystream shower head delivers on its promise.  It provides a stream of water that handily rinsed the shampoo out of my long thick hair.  Did I notice that the water flow is lower than with my old shower head?  Yes.  But did I find it problematic?  Not at all.

So go ahead…change to low flow shower heads.  Do something for the environment that won’t break the bank.  And check back next month for another Practical Sustainability column!

Leave a comment and share which low flow shower head works for you!

Fire Safety Part I: Residential Fire Sprinkler System for the Sunset Green Home?

In planning for the Sunset Green Home, we have done a lot of thinking about durability.  We lost our previous home to flooding caused by Hurricane Sandy, so we have a lot of respect for Mother Nature.  That's why the new house will be nine feet higher than our old home.

And in choosing to build to LEED® for Homes green building standards, we have used the LEED framework to devise durability strategies for non-toxic termite control, managing moisture inside, outside and between the walls of the house, and to mitigate the effects of natural disasters such as hurricanes.  All of these important durability measures are designed to protect our home and keep us safe from pests, nature and environmental toxins.

Image courtesy of digitalart/ FreeDigitalPhotos.net

Image courtesy of digitalart/ FreeDigitalPhotos.net

Naturally, having lost our home due to flood, we've spent a lot of time thinking about water.  But lately, we've also been thinking about fire safety.  While our house was rendered uninhabitable by Hurricane Sandy’s storm-surge induced flood waters, 135 homes in Breezy Point, NY and several in Greenwich, CT were destroyed by fire in the same storm. 

According to the U.S. Fire Administration (a division of FEMA), "More than 3,400 Americans die each year in fires and approximately 17,500 are injured. An overwhelming number of fires occur in the home. There are time-tested ways to prevent and survive a fire. It's not a question of luck. It's a matter of planning ahead."

Building codes mandate the installation of smoke detectors, and the Sunset Green Home is going the extra step of having them tied into our home security system's central monitoring service.  But, for a two-story single family residence, should we be doing more to plan ahead?  Would it make sense to install a residential fire sprinkler system?  How should we evaluate the choice to do so?

We can think about the decision in terms of the Triple Bottom Line, which goes beyond a traditional economic-only bottom line analysis to include an assessment of the value in terms of environmental impact and impact on people (see my earlier post for more of the vocabulary of sustainability). 

 In terms of economics, Newport Partners’ 2013 Home Fire Sprinkler Cost Assessment report examined 51 homes in 17 communities and found that the average system cost was $1.35 per sprinklered square foot (down from $1.61 in 2008).  At just under 5,000 square feet (considering the main residence and an accessory structure on the site of the project), that's somewhere around $6,750 in total for the system (though we received one bid at $2.75 per square foot, which is more than double the report’s findings).  Our insurance agency tells me that insurers look favorably at residential sprinkler systems, and that we might see a reduction in our homeowner's policy premium if we install one.  What is unclear is how much we might save by doing so.  A 2007 NAHB study titled Fire Sprinklers and Homeowner Insurance suggests that the savings are in fact quite small – the best savings was reported in Florida and was only $95 per year.  If this is the case, the payback period could be very substantial.  And our situation is further complicated by our coastal location, where standard insurance carriers do not write policies.  

Should we experience an actual fire, the economics become compelling.  According to the American Fire Sprinkler Association, “most fires are completely controlled with the activation of only one or two sprinklers. Fire hoses, on average, use more than 8 times the water that sprinklers do to contain a fire.”  U.S. Experience with Sprinklers, a 2013 study by John R. Hall, Jr. studied the cost of damage from fires reported during the period 2007 – 2011.  For homes (including apartments) without sprinklers, the average damage per fire was $20,000, which was reduced to $7,000 when Wet Pipe Sprinkler systems were present.

The environmental impact of having a residential fire sprinkler system can be thought of as a combination of the added impact of the system materials themselves and the opportunity cost of not having the system should the home experience a fire.  There's an upfront environmental cost of the PVC pipes and system controllers.  However, according to a 2010 report by FM Global, the environmental benefits of automatic sprinklers are significant.  The report presents the findings of large-scale fire tests where fires were controlled by two methods: fire service intervention vs. a single residential fire sprinkler.  The study found that in the event of a fire, residential sprinklers could reduce water usage by as much as 91% and greenhouse gas emissions by nearly 98%.

Lastly, the human benefits of adding a residential fire sprinkler system are significant.  In the event of a house fire, a home sprinkler system might provide enough fire suppression to allow the home's occupants to exit the building safely.  By treating the blaze before firefighters can arrive on the scene, the system will reduce the risk to the first responders, who often put their lives in danger when they enter a burning home.  In fact, while “more than 8 in 10 fire deaths occur in homes…the likelihood of someone dying in a home fire is cut in half when sprinklers are present,” said Gary Keith, NFPA’s vice president of field operations, in a 2008 press release.

Municipalities are getting on board.  I spoke with a representative from the New York State Division of Building Codes and Standards, who told me that the International Code Council has already mandated residential sprinkler systems in one- and two-family residences regardless of their height.  New York generally follows the International Codes.  So it may just be a matter of time before all new homes in my state are required to install them.  While Sunset Green Home has a choice regarding a home fire sprinkler system, builders of new homes may not as early as next year. 

We haven't made a final decision about a residential fire sprinkler system; we are waiting for additional proposals from licensed installers so that we can understand the costs in greater detail.  And our decision also involves understanding our personal fire risks.  I do a lot of cooking, and according to the Centers for Disease Control and Prevention (CDC) cooking is the leading cause of house fires.  However, the CDC also notes that smoking is the leading cause of fire-related deaths, and we do not have any smokers in our family.

Stay tuned.  We'll post an update when we make our final decision.

Early Spring Salad in a Jar – Grow Your Own!

Spring is in the air!  Today was a picture perfect day for gardening and I spent the morning planting radishes, spinach, arugula, peas and several other early spring crops.  In just a few weeks, we’ll be eating salad that we grew ourselves.  After our seemingly endless northeast winter, I’m really looking forward to the rebirth of my garden.

I had dinner a couple of weeks ago with my friends Taryn and Lisa.  Taryn had just returned from vacation where she had been served a salad in a canning jar.  I love that idea!  Jars are reusable and travel well.  No plastic containers to discard.  And, since I’m a fanatical canner, I have tons of empty jars taking up space in every drawer and cabinet in my kitchen (from last year’s pickles, chutneys, sauces…which we used throughout the winter).  So, I figured I’d give salad-in-a-jar a try…

I remembered that my favorite canning site, Food in Jars, had written a post about a handy insert that separates a canning jar into compartments, so I ordered one from Amazon figuring that I could use it to hold the salad dressing.  Here’s my early spring salad – in a regular wide-mouth Ball jar and with the dressing in a Cuppow BNTO lid insert.

The only thing better than this will be when the salad and veggies come from my own garden!  Just a few more weeks to wait.

Happy gardening and happy eating!

Spring salad in a canning jar, with a Cuppow BNTO insert to separate the salad and dressing.

Spring salad in a canning jar, with a Cuppow BNTO insert to separate the salad and dressing.


Back by Popular Demand - DIY Raised Garden Beds!


Click on the image above for Rasied Bed Corners from Gardeners.com


Click on the image above for Aquacorners from Gardeners.com


Many of you have reached out to me about building raised garden beds this summer.  After our seemingly endless winter, the sun is shining today and our temperature should top 60 degrees.  It's really time to start gardening! 

I swear by the method of dense companion planting in raised beds (read Sally Jean Cunningham's Great Garden Companions - it's my "go to" gardening bible).  Planting your crops close together, with herbs and flowers interspersed amongst them, will eliminate the empty spaces where weeds might take root.  And if you line your beds with "hardware cloth" (1/2" wire mesh that you can find at Home Depot or Lowe's), the burrowing critters won't be able to find their way to your crops.  Most importantly, raised beds will save your back when you're tending the garden!

Original raised bed on the right; expansion materials and new bed half completed at center.

Original raised bed on the right; expansion materials and new bed half completed at center.

I've built two types of raised beds and they're both attractive and durable.  The first type - which is less costly, but more labor intensive (perfect for experienced DIY-ers) - was described in detail in an earlier post

The second type uses Raised Bed Corners and In-Line Connectors from Gardener's Supply Company and assembles in minutes. For a 12" high bed, all you need are the 12" raised bed corners and two rows of 2x6 lumber (see photo above of our expansion, half completed, with one row of 2x6 lumber already in place). Size possibilities are endless and you can even create beds that have sections of varying heights. Just make sure to purchase lumber that corresponds to the size of the corners and connectors that you intend to use. Include the in-line connectors if you plan to construct beds that are longer than 8 feet.

I used untreated cedar, but the National Gardening Association says that new ACQ pressure treated lumber is safe for vegetable gardens too.  My local lumberyard, Speonk Lumber, cut the cedar boards for me so that all I needed to do was slip each board into the slots in the raised bed corners and insert a screw to hold it all together.

Once I assembled my garden beds, I combined equal amounts of organic topsoil and compost from my local garden center (ordered for my initial beds by the cubic yard, which is far less expensive than purchasing by the bag), along with some peat, and shoveled everything into the beds.  To figure out how much soil mix I needed, I multiplied together the length, width and height of my bed in feet, and then divided by 27 to obtain the number of cubic yards of soil mix.  For my first beds, which were 18" high and 4' wide by 8' long, I needed (1.5 x 4 x 8) / 27 = 1.8 cubic yards of soil mix.

The only thing I had left to do was add water and seeds.  Providing a regular supply of water to your garden beds is critical.  In my 4' wide beds, I have three parallel lengths of drip hose running down each bed to ensure that every plant in the bed has access to an adequate water supply (see photo).  My irrigation operates on a timer, and I water before sunrise each day to ensure that the water goes directly to my plants' roots and doesn't evaporate in the heat of the day. Gardeners.com sells Aquacorners and DIY drip systems.  Although I didn't use them in my garden beds, they are well-reviewed on the Gardeners.com web site.

Expansion complete!  Soil and irrigation in place...all we need now are seeds and water.

Expansion complete!  Soil and irrigation in place...all we need now are seeds and water.

Rome wasn't built in a day.  But my garden beds were.  If you've been thinking about starting a garden, now's the time.  In the northeast, where I live, it's time to plant peas, lettuces, spinach, radishes and a host of other cool weather crops.  I'll have my hands in the dirt this weekend.  What are you waiting for? 

Leave a Comment!  Tell us about your Raised Garden Beds.

Deconstruction Part II: Time-Lapse Video - The Unmaking of a House

We have completely removed the old house from the site of the Sunset Green Home project. 

Nothing left but the cinder block foundation.

Nothing left but the cinder block foundation.

If you read our earlier blog post, you know that we used whole home deconstruction rather than traditional demolition.  For a typical 2,000 square foot house, demolition sends 127 tons of debris to the landfill.  Deconstruction salvages any reusable building materials and recycles as much as possible.  We’re still awaiting our diversion numbers, but we anticipate that we will have diverted at least 70% of the demolition waste away from the landfill – enough to earn a LEED point for the Sunset Green Home project.

I think of Deconstruction as a perfect example of the “Triple Bottom Line” – which expands the traditional bottom line focus on economic profit to include two additional dimensions – those of environmental benefits and human capital gains. 

  • In Deconstruction, the environmental benefit is obvious.  Deconstruction keeps the vast majority of a building’s materials out of our overstressed landfills. 
  • The economics can work out favorably as well.  Although Deconstruction costs about twice as much as traditional demolition, the salvaged materials are donated to non-profits such as Habitat for Humanity and Build It Green! NYC.   Tax deductibility of the in-kind donation can offset the added cost.  Having an independent third-party appraisal is critical, and you should check with your tax adviser before relying on any outside information (including what you read here…I am not a tax professional!).
  • Finally, Deconstruction builds human capital.  The process is labor intensive and, as such, provides jobs in green building trades. 
The finished product - an empty lot, graded and ready for construction.  Photo courtesy of Chris Mensch

The finished product - an empty lot, graded and ready for construction.  Photo courtesy of Chris Mensch

Deconstruction is not just for whole homes; it’s also a great way to remove kitchens and baths in a home that is slated for renovation.  The salvaged building materials will be given a second life when you’re finished with them!

I’m happy to speak with anyone who would like more information...just fill out the Contact Us form on SunsetGreenHome.com and I’ll get back to you.

We’re very proud of our whole home deconstruction.  And while the house was coming down, we documented the process via time-lapse video, including interviews of the crew from Details who deconstructed the house!  Take a look at the “unmaking” of a house.  Enjoy!

House Tours: A LEED® Gold House in Ski Country

What do you build when you’re a successful commercial real estate developer, you’re ready to build a home for your family, and it’s 2007 – a year when the LEED for Homes green building program is still in its pilot phase?  A LEED for Homes house, of course!

I had the good fortune of touring a “mountain modern” style home just outside Vail, CO this week.  Frank Navarro, the homeowner, explained that when they bought the building lot, he and his wife Allison knew they wanted to build a LEED certified home.  Frank is an architect-turned-sustainable developer, and couldn’t imagine building it any other way. 

Photo courtesy of Frank Navarro

Photo courtesy of Frank Navarro

Frank assembled a team that included a LEED accredited sustainability consultant, an architect who was well-versed in passive solar design, and a builder who, while not experienced with the LEED program, was nonetheless hungry to move his business in the direction of constructing sustainable homes.

What struck me when I entered the house was how quiet it is.  Frank explained that theirs was the first house in its area to use triple pane windows.  Their views of the mountains across a wide valley are exquisite and face south, so large walls of glass were a key design feature.  And triple pane glazing is how the team was able to achieve the insulating properties they needed.  The architect designed deep overhangs to shade the home from summer sun while permitting winter sunlight to enter and warm the house.

Photo taken from inside the home, through one of its large picture windows.

Photo taken from inside the home, through one of its large picture windows.

One of the things I like about the LEED for Homes program is its flexibility in how a project team can accrue points toward certification.  The Navarro home racked up points using sustainable finishes throughout.  Exterior cladding is “beetle kill” pine – a local, sustainable option.  The interior features low VOC cabinetry, plaster, paint and carpet – all of which earn points under the Materials and Resources category.  But most interesting are such details as the beautiful pressed sorghum grass composite bar countertop, local stone fireplace surround with granite banding, poured concrete flooring set in a sustainably harvested wood grid, and recycled glass and concrete bathroom countertops.

The house is extremely energy efficient, with a sizable solar PV array as well as a ground-mount solar thermal system that provides domestic hot water – taking advantage of the 300 days of sunshine that the area enjoys. 

Photo courtesy of Frank Navarro

Photo courtesy of Frank Navarro

When I asked if there were any elements he would have liked to include but didn’t, Frank mentioned rainwater harvesting – which was prohibited by local water rights laws.  Instead, the home uses Xeriscaping – a landscaping method that uses drought-tolerant native vegetation and requires little or no irrigation.

The home is large – 6,300 square feet – which meant that it needed to earn even more points for LEED certification than a comparable house of smaller size.  Nonetheless, the house earned LEED Gold certification, and with no compromise in function or aesthetics.

Frank has his sights on a LEED residential condominium development.  Doubtless, if it’s anything like the home he built for his family, it will be beautiful, functional and sustainable.

The Language of Green...

When I married my husband, I married into a family of doctors.  In the early years, having a meal with them was like being transported to a Martian dining room.  They spoke a language I simply didn’t understand.  But eventually I caught on.  And now, although I don’t recognize every acronym or Latin name that comes up, I feel pretty confident that I get the gist of the conversation. 

So, when I immersed myself in the sustainability world and began studying for my LEED Green Associate exam, I wasn’t surprised to find that I had catapulted myself backwards into the early years of my marriage when I was a traveler in a foreign land trying to understand the conversation. 

I’ve compiled the following list of important “green” terms and acronyms to help sustainability newcomers get up to speed.  Happy reading!

Building Envelope

Also referred to as the building shell, the building envelope comprises the exterior of a building, including walls, floors, roof, and windows.  The building envelope is the boundary between the interior conditioned spaces of a structure and the outdoors.  The most energy efficient buildings start with very tight building envelopes, which result from advanced framing techniques, high efficiency windows (with, for example, insulating argon gas between panes and low emissivity – low-E – coatings to reduce solar heat gain), and comprehensive insulation that eliminates gaps that air and moisture might infiltrate.  In the Sunset Green Home, spray foam insulation and very efficient windows are two of the strategies that will improve the tightness of our building envelope and result in greater overall energy efficiency for the project.

Resources: http://gbssmag.com/2012/08/starting-with-a-tight-building-envelope-to-reduce-first-costs/

Carbon Footprint

A carbon footprint is the extent of the impact of our activities on our climate, measured in terms of Greenhouse Gases (typically carbon dioxide, but also including methane and others).  A comprehensive calculation of carbon footprint would include the impact of manufacturing, shipping, storage, use and disposal.  This Wall Street Journal article calculates the carbon footprint of some basic household items.  It’s eye-opening!  Among other strategies, the Sunset Green Home project will use Energy Star appliances, generate electricity through solar photovoltaics and specify building materials sourced regionally in order to minimize our carbon footprint.

Resources: http://www.nature.org/greenliving/carboncalculator/

FSC

The Forest Stewardship Council’s mission is to “promote environmentally sound, socially beneficial and economically prosperous management of the world’s forests” and it has developed a certification program that “ensures that products [labeled as FSC certified] come from responsibly managed forests that provide environmental, social and economic benefits.”  The LEED for Homes program states a preference for using FSC certified wood products, and has a prerequisite that any tropical hardwoods used in a project must be FSC-certified. 

Resources: https://us.fsc.org/

Greenhouse Gases (GHG)

Greenhouse gases – such as carbon dioxide, methane and nitrous oxide – trap heat in our earth’s atmosphere.  According to the Environmental Protection Agency (EPA), they “absorb energy, slowing or preventing the loss of heat to space.  In this way, GHGs act like a blanket, making Earth warmer than it would otherwise be.”  In recent years, human activity – primarily the burning of fossil fuels – has been the primary source of a rapid and significant rise in the emission of greenhouse gases into our atmosphere.  By generating most of its electricity through clean renewable solar photovoltaics, the Sunset Green Home will minimize its use of fossil fuels and, consequently, its generation of GHGs.

Resources: http://www.epa.gov/climatechange/science/causes.html

Greenwashing

Greenwashing refers to the practice of using misinformation to promote the notion that a company, product or service is environmentally friendly.  Think of a hotel that touts itself as “green” because it offers guests the opportunity to reuse their sheets and towels, but doesn’t take any additional steps to become more environmentally friendly (such as installing energy-efficient lighting, drought-tolerant landscaping, or storm water runoff controls).

Resources: http://en.wikipedia.org/wiki/Greenwashing and http://www.greenwashingindex.com/

Heat Island Effect

Have you ever noticed that it’s warmer at night in a city than in the countryside?  That’s an example of the heat island effect – where hardscapes (buildings, pavement, etc.) absorb the sun’s heat and then radiate it to surrounding areas.  The heat island effect results in a greater need for cooling technologies, which are responsible for higher energy costs, increased greenhouse gas emissions, and increased air pollution.  Using light colored pavement or green roofs (which are becoming increasingly popular in urban areas) are two strategies for reducing heat island effects.  The Sunset Green Home project will reduce the heat island effect of the home by foregoing asphalt in favor of a light colored pervious stone driveway.

Resources: http://www.epa.gov/heatisland/

MERV

MERV, or Minimum Efficiency Reporting Value, refers to the efficiency of air filters in the mechanical systems (heat and air conditioning) of a building.  MERV ratings range from a low of 1 (very low efficiency) to a high of 16 (very high efficiency).  With today’s very tight building envelopes, indoor air quality has become a concern.  Using high MERV filters increases the filtration of harmful particles out of the air we breathe indoors.  Specifying high MERV filters is a relatively inexpensive way to improve indoor environmental quality.  The Sunset Green Home project will use very high MERV filters in its HVAC systems.

VOCs

Volatile Organic Compounds are carbon-based chemicals that evaporate at room temperature.  Examples include acetone, formaldehyde, benzene and others.  Many of the products in our homes have the potential to “off-gas” VOCs, and VOC concentrations indoors are typically 2x – 5x higher than outdoors.  Health effects are based on the level of VOC concentration and the exposure time, and may include headaches, upper respiratory symptoms and eye irritation or, with long-term exposure to high levels, increased risk of cancer or central nervous system damage.  Although we often think of VOCs as smelling bad (think of a freshly painted wall), not all VOCs create an odor.  But, in today’s well-insulated and tightly sealed homes, VOCs can build up quickly and to high levels.  The Sunset Green Home project will include low-VOC or no-VOC paints, adhesives, finishes and furnishings wherever possible, and we will “flush” the home with fresh air for several days before we take occupancy.

Resources: http://www.health.state.mn.us/divs/eh/indoorair/voc/ and https://www.health.ny.gov/environmental/indoors/voc.htm

And now that we’ve provided some “green” terms, what about LEED?  What is all this “LEED” stuff about anyway?

LEED

LEED stands for Leadership in Energy and Environmental Design.  According to the U.S. Green Building Council, LEED “is a green building certification program that recognizes best-in-class building strategies and practices.”  LEED is a flexible rating system that can be used to certify buildings ranging from single family homes to commercial office buildings.  There’s even a LEED rating system to certify the operations and maintenance of existing buildings.  Each LEED rating system has its own prerequisites and optional credits for obtaining certification levels of Certified, Silver, Gold or Platinum.  The Sunset Green Home is registered under the LEED for Homes green building program and will seek Platinum certification – the highest level – upon completion.

Resources: http://www.usgbc.org/leed

LEED Accreditation vs. LEED Certification

Simply put, BUILDINGS are certified and PEOPLE are accredited.  LEED certification is described above.  LEED accreditation recognizes individual levels of understanding and experience with green building.  There are three levels of LEED accreditation: LEED Green Associate, LEED Accredited Professional (LEED AP) and LEED Fellow.  Credentialing is overseen by the Green Building Certification Institute (GBCI), which also oversees LEED project certification.

Resources: http://www.usgbc.org/leed/credentials

USGBC

According to its web site, the U.S. Green Building Council (USGBC) “is a 501(c)(3) nonprofit organization committed to a prosperous and sustainable future for our nation through cost-efficient and energy-saving green buildings.  USGBC works toward its mission of market transformation through its LEED green building program, robust educational offerings, a nationwide network of chapters and affiliates, the annual Greenbuild International Conference & Expo, and advocacy in support of public policy that encourages and enables green buildings and communities.”

Resources: http://www.usgbc.org/

Passivhaus or “Passive House”

LEED isn’t the only green building standard.  In fact there are several.  Developed in the early 1990s, the Passivhaus standard is one of the world’s leading green building standards.  Passivhaus is based on the principle of creating an exceptionally tight and well-insulated building envelope with mechanical ventilation to cut down on – or eliminate altogether – the need for conventional forms of heating and cooling.

Resources: http://www.passivehouse.us/passiveHouse/PassiveHouseInfo.html and http://passiv.de/en/index.php

Now that you know green, go green!


LEED for Homes Says to Grow Green. We Agree!

A food garden – and a LEED point – for the Sunset Green Home.  That’s a point we wouldn’t consider leaving “on the table.”  According to the LEED for Homes green building program, the intent of the Food Garden credit is “to provide a functional and sustainable means of supporting the homeowner’s food needs.” LEED for Homes awards one point under the Innovation in Design credit category to projects that install a garden of at least 200 square feet. 

Sunset Green Home Raised Bed Garden.JPG

I’m an avid gardener.  And my garden has been organic since we built it shortly after purchasing our home.  We constructed several untreated cedar raised beds (see my earlier blog post to learn how to build your own) and began gardening right away.  My garden, with 12 distinct planting areas (four of which are occupied by perennial asparagus and strawberry crops), tops out at about 200 square feet of productive, easy-to-access raised planting beds. 

Sally Jean Cunningham’s Great Garden Companions has been my gardening bible since Day One – and I’ve given away countless copies of it to friends and family.  With beautiful photographs and useful graphics, Great Garden Companions offers a blueprint for setting up and managing a pesticide-free organic garden. 

What’s the secret?  Planting “neighborhoods” of vegetables, herbs and flowers that either attract beneficial insects or deter and confuse the more harmful insects (the herbs and flowers do double duty by crowding out unwanted weeds as well). Coupled with annual crop rotation (which was my “excuse” for adding more beds during my garden’s second year), the companion planting method has worked well for me. 

Sunset Green Home Garden.JPG

Until Hurricane Sandy walloped my garden, I was able to grow nearly all of the produce to feed my family of five from May until October – with an abundance of “extras” that I turn into pickles, chutneys, ketchup and sauce that we can eat through the winter. 

Sunset Green Home Garden - Cabbages and Herbs.JPG

We have asparagus, lettuce, spinach and radishes in May and June; peas and strawberries in early summer; onions, cucumbers and beans throughout the summer; carrots, tomatoes, squash and peppers in late summer…and so much more that I don’t have space to list! 

Sunset Green Home Garden Beets.JPG

We even eat nasturtiums and make chamomile tea from our companion flowers!

Sunset Green Home Garden Nasturtiums.JPG

No fossil fuels are burned to move the food from my garden to my kitchen.  And I know exactly what has gone into producing what we eat – sunshine, water, homemade compost and organic seeds!

That’s what the LEED green building program had in mind when it approved a credit for building a food garden.  And when we move our garden beds to higher ground once the Sunset Green Home is built, we plan to earn the food garden point!

Gardening is easy and healthful.  And you don’t need to build a LEED home to start a garden.  So what are you waiting for?  Find a sunny spot, build a garden bed, and grow local.  Happy gardening!

Leave a comment!  Tell us your best gardening story, or let us know about a special variety that you plant in your own garden...

Benchmarking: First, Know Your Impact - Then Change It!

Green: (ɡriːn) – adj. Concerned with or relating to conservation of the world’s natural resources and improvement of the environment. (Source: World English Dictionary).

We hear a lot of talk about "going green."  So, what does it mean to be green, anyway?  Broadly speaking, “green” relates to stewardship of the environment.  That’s pretty wide-ranging…which suggests there are a lot of ways that we can “go green.” 

But before we can make changes, we need to understand our impact on the environment.  That's why the LEED for Homes program rewards projects that either install advanced energy monitoring systems to track energy and water use, or enroll in the USGBC's Building Performance Partnership for all of its utility accounts.  The Sunset Green home project is planning to capture a point toward certification this way.

You, too, can easily track the impact of your activities on the health of our environment.  And once you're armed with information, you may even want to take action to reduce your "footprint."  Here are a few ideas...

Image courtesy of digitalart/ FreeDigitalPhotos.net

Image courtesy of digitalart/ FreeDigitalPhotos.net

1.       Arm yourself with information about your home’s energy use.  Sign up with wegowise to track your use of water, electricity, oil and gas.  Wegowise’s free wegoHome service will allow you, over time, to track your utility usage, analyze your consumption, and measure the results of any upgrades you put into place.  The sooner you start, the sooner you’ll have useful information to act upon.  Get your kids involved...make learning about and lowering your energy consumption a family project.  

2.       Know your carbon footprint and erase it.  The Nature Conservancy has a comprehensive calculator and a way to donate to the organization to support its carbon offsetting projects. 

3.       Erase your carbon footprint when you travel.  Check out Trip Zero, a new travel service that calculates your carbon footprint every time you travel, and automatically offsets it when you use the site to book your hotel. The best part about it?  It’s free.  Trip Zero promises that you won’t pay more for the hotel room than if you booked through another travel service.  For the science nerds among us, Trip Zero also provides a nifty explanation of how a carbon footprint is calculated.

4.       Erase your carbon footprint when you drive.  We can’t all trade our cars in for hybrids or electric vehicles.  But we CAN offset our impact on the environment by calculating the carbon emissions of our cars and funding projects that offset our impact on the environment.  TerraPass has a calculator and a subscription service that makes it easy for you to erase the impact of your driving. 

These are only a few (out of many!) ways that you can better understand - and take action to reduce - your environmental impact.  Another source of information is the Carbonfund.org Foundation web site, which has a page devoted to strategies for reducing your carbon footprint.

The more you know, the more you can do.  Arm yourself!

Deconstruction 101: It’s all in the Details

If breaking ground on the Sunset Green Home project is considered “getting out of the starting gate” then removing the house that was substantially damaged by Hurricane Sandy is akin to getting into the starting gate.  And we’re almost there…

Sunset Green Home Under Deconstruction.jpg

Today was Day Four of our Whole House Deconstruction effort, and the house is about halfway down.  So what is deconstruction and why are we doing it?  Deconstruction is NOT demolition.  A typical demolition job would take a fraction of the time that is required for deconstruction, and would cost about half as much.  But 100% of the house would be bulldozed and dumped into a landfill. 

By contrast, whole house deconstruction refers to the careful dismantling of a structure to preserve materials that can be reused elsewhere and to recycle materials that cannot be reused in their current form.  Deconstruction is done by hand.  Workers trained in deconstruction strip the inside of the house, salvaging any fixtures, fittings and materials that can be reused, and setting them aside to be donated to non-profits such as Habitat for Humanity or Build It Green! NYC.

Once the inside of the house has been disassembled, the house is taken apart shingle-by-shingle and stud-by-stud from the roof to the foundation.  Again, any materials that can be salvaged – such as windows and flooring – are carefully removed and earmarked for donation.  Whatever can’t be salvaged is taken by a waste hauler who is focused on recycling and is able to divert a significant portion of the waste away from the landfill.

Details Deconstruction Removing Sunset Green Home Windows.JPG

The Sunset Green home is being deconstructed by Details, a division of Humanim, a Baltimore-based non-profit organization whose mission includes workforce development programs.  Details teaches green building practices and provides entry level employment to members of its crews. 

Details Deconstruction Crew at Sunset Green Home.JPG

And in fulfilling its mission, Details keeps thousands of tons of waste from entering our nation’s over-stressed landfills (one estimate by the Deconstruction Institute, funded by the Florida Department of Environmental Protection, estimates a 2,000 square foot house would, if demolished, generate 127 tons of debris). 

The Sunset Green Home project hopes to earn one point toward LEED certification by diverting over 70% of our demolition waste through the deconstruction process.

Our crew is hard at work deconstructing the house on the Sunset Green Home site.  Like I said, it's all in the Details...

Details Deconstruction Team at Sunset Green Home.JPG

Preliminary Rating: We're Going for Platinum!

The Sunset Green Home project is registered under the LEED for Homes green building program, and we're going for Platinum!  If you're interested in learning more about the LEED process, read on...

15 months ago, Hurricane Sandy substantially damaged our home, which stood on the site where the Sunset Green Home will be built.  For the past several months, members of the project team have been working together to design the new house.  We’ve tapped into the expertise of our architect, landscape architect, builder, and other experts in sustainable building practices in what is termed an Integrated Project Planning approach. 

Team members: Architect, Bill Heine: LEED AP Homes, Kathryn Cannon; LEED Green Rater, Rich Manning; and Builder, Chris Mensch

Team members: Architect, Bill Heine: LEED AP Homes, Kathryn Cannon; LEED Green Rater, Rich Manning; and Builder, Chris Mensch

Earlier this month, at our second LEED Design Charrette meeting, the team met to focus on systems and infrastructure considerations, as a previous Design Charrette meeting had addressed site planning, building orientation and landscaping issues.

With most of our “big decisions” behind us, it was time to discuss our Preliminary Rating, or LEED certification level we would seek.  Conducting a Preliminary Rating is a prerequisite of the LEED for Homes green building program.  And it’s the first of three prerequisites in the Innovation in Design Process category.  A project that seeks LEED certification must satisfy 25 prerequisites, after which it may choose which of the 136 optional points it will aim to earn from eight major categories. 

Each project is different, which is why the LEED for Homes program provides a number of paths to certification.  Unlike other LEED rating systems, which have a fixed scale for certification, LEED for Homes makes a home size adjustment; larger homes must earn more points at each certification level than smaller homes.  Based on the Sunset Green Home project’s conditioned area of just under 3,600 square feet, we must earn 94 points for LEED Platinum certification.  It’s ambitious, but we’ve decided to go for it!

Check out our LEED points page, which we’ll update periodically as we finalize our strategies and point targets.

Grow Green! Start with Raised Planting Beds

Some sustainable practices are easily incorporated into your life and will bear fruit right away.  Pun intended!  It’s cold and snowy here in NYC, but I’m already thinking about the inevitable arrival of spring…and for me that means gardening.

Sunset Green Home garden in midsummer bloom.

Sunset Green Home garden in midsummer bloom.

Raised bed gardening is an easy, space efficient, and healthful way to go green.  By growing your food yourself, you'll know that you aren't ingesting any harmful pesticides and that no fossil fuels were burned to get the food to your doorstep.  And growing your own produce also contributes to biodiversity; you can pick from the many heirloom varieties that cannot be grown by commercial growers whose crops are often limited to ones that have been engineered to hold up to handling and transportation.  If that’s not enough to convince you, just wait until you taste a fresh asparagus spear straight out of the ground – it’s better than the best you’ll find in your local grocery store!

Now that you’re convinced, how can you make your garden a reality? 

Building Sunset Green Home Garden Beds.JPG
Raised Garden Bed Under Construction.JPG
Raised Bed Garden Under Consruction.JPG

To build our raised garden beds, we used untreated cedar for its natural pest-resistant properties (redwood would have been fine, too). Consider using wood that has been certified by the Forest Stewardship Council (FSC), which has been sustainably grown and harvested.  There’s been a lot of debate about using untreated vs. pressure treated wood for garden beds. Pressure treated wood will last longer than untreated wood, but doesn’t meet organic gardening standards. However, the National Gardening Association says that new ACQ pressure treated lumber is safe to use for garden beds.

Sunset.com has a great tutorial on building raised garden beds.  We used their plans with a couple of modifications to build our first 18” high raised beds (most notably, Sunset's plans are for 12" high beds; we added a row of 2 x 6 boards to increase the height). They’re beautiful and have withstood the test of time.  Working together with my father and my sons, we were able to build and install three 4 x 8 foot beds in one day (it helped that the lumber yard pre-cut the boards to the lengths we needed). 

For clients and friends (and for my own garden expansion), I have relied on raised bed corners and connectors from Gardeners.com to assemble raised beds in a jiffy. 

Regardless of which design you choose for the boxes, make sure you incorporate these elements into your plan:

1.       Keep your beds to a maximum of four feet wide.  Three to four feet is ideal.  It’s hard to reach the produce in the middle of a bed that is more than four feet wide without stepping on or leaning into the soil and causing it to become compacted. 

2.       Lay down ¼” metal mesh Hardware Cloth in the bottom of your planting boxes to prevent tunneling pests (moles come to mind!) from reaching your produce

3.       Staple Landscape Fabric to the inside faces (but not the bottom!) of your planters to keep your soil from leaking through the cracks between your boards when you water, and to protect the wood from excess moisture

4.       Install drip irrigation on a timer with a separate manual cut off valve if you have multiple beds.  Some fruits – notably watermelons – don’t want to be watered at all once their fruit has set…but you may not want to set up separate watering zones for each bed.  A manual cut off will easily solve the problem.

5.       Once you have prepared your beds, fill them with a good quality mix of organic topsoil, compost and peat. 

In my Plant Hardiness Zone, I can start planting some of my early crops as soon as next month.  SproutRobot has a neat tool for determining when you can start planting outdoors where you live.  Make sure you get your raised beds built in time to be ready to start planting.  And bookmark my Garden Journal so you can check back throughout the spring as I add tips for crop selection and low maintenance growing.

Happy gardening!